
VNet peering Overview
Virtual network peering enables you to seamlessly connect Azure virtual networks. Once peered, the virtual networks appear as one, for connectivity purposes. The traffic between virtual machines in the peered virtual networks is routed through the Microsoft backbone infrastructure, much like traffic is routed between virtual machines in the same virtual network, through private IP addresses only. Azure supports:
- VNet peering – connecting VNets within the same Azure region
- Global VNet peering – connecting VNets across Azure regions
This blog post shows how to Configuring VNet Peering using the Azure portal
Create a virtual network
A virtual network is the fundamental building block for your private network in Azure. It enables Azure resources, like virtual machines (VMs), to securely communicate with each other and with the internet.
On the upper-left side of the screen, select Create a resource > Networking > Virtual network.

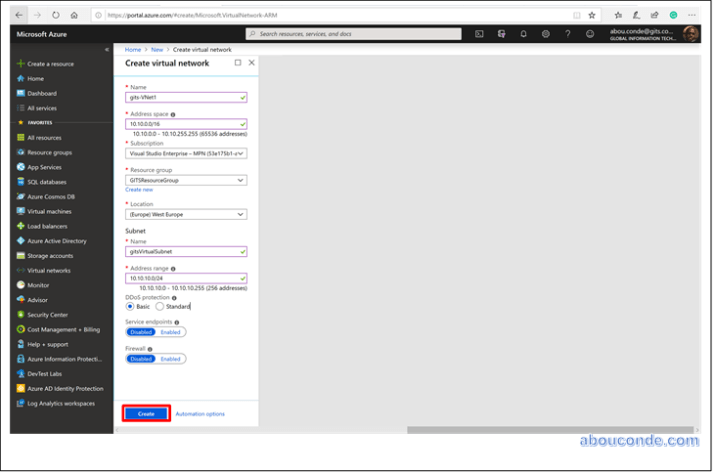
In Create virtual network, enter or select this information to create gits-VNet1:
| Setting | Value |
| Name | Enter gits-VNet1. |
| Address space | Enter 10.10.0.0/16. |
| Subscription | Select your subscription. |
| Resource group | Select Create new, enter gitsResourceGroup, then select OK. |
| Location | Select East US. |
| Subnet – Name | Enter gitsVirtualSubnet. |
| Subnet – Address range | Enter 10.10.10.0/24. |
Leave the rest as default and select Create.
In Create virtual network, enter or select this information to create gits-VNet2:
| Setting | Value |
| Name | Enter gits-VNet2. |
| Address space | Enter 10.20.0.0/16. |
| Subscription | Select your subscription. |
| Resource group | Select Create new, enter gitsResourceGroup, then select OK. |
| Location | Select East US. |
| Subnet – Name | Enter gitsVirtualSubnet. |
| Subnet – Address range | Enter 10.20.20.0/24. |
Leave the rest as default and select Create.

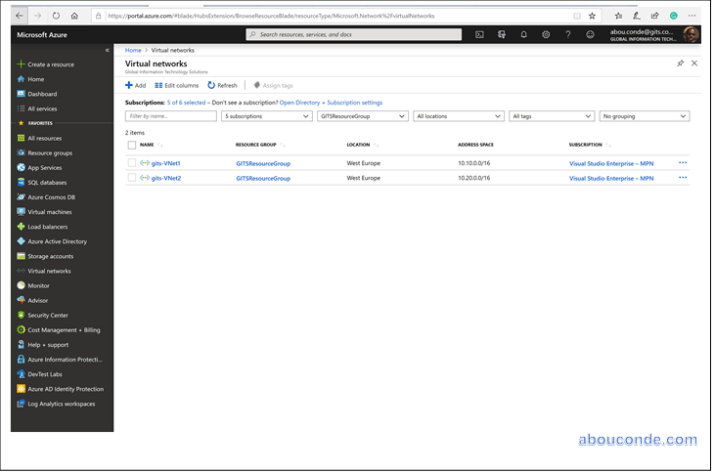
Azure Virtual Network (VNet) 1 & 2 successfully created
Create a VNet peering
Before configuring of Azure VNet Peering, you need to ensure to meet the following requirements:
- Two VNets should be in the same region but can be in two different subscriptions
- Two VNets should have non-overlapping IP addresses
- There is no derived transitive relationship
Select the virtual network in the list that you want to create a peering for.
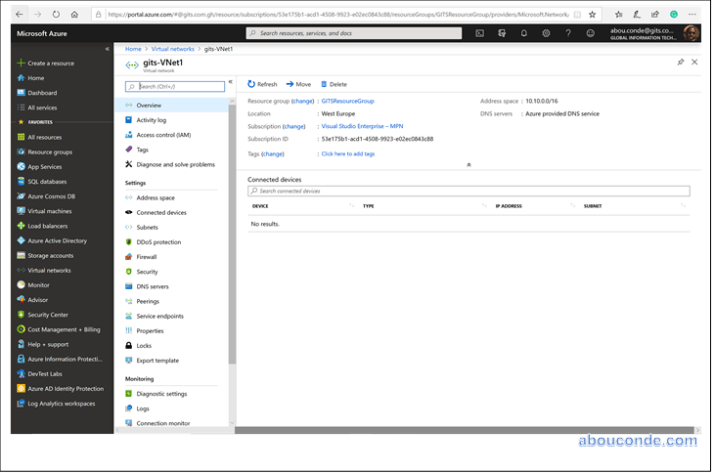
Under SETTINGS, select Peerings. Select + Add.

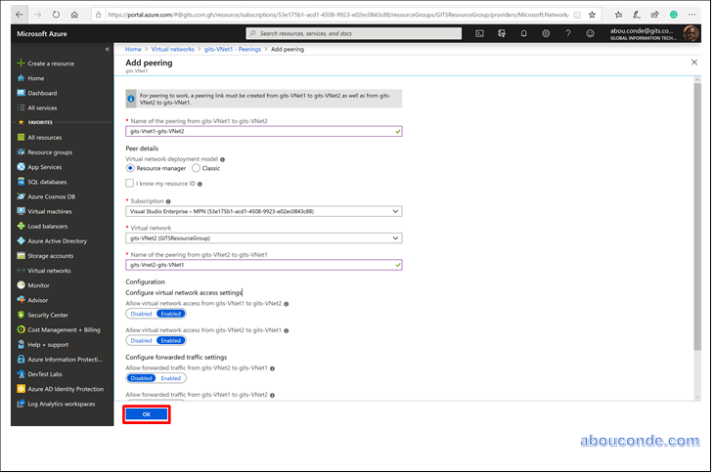
Enter or select values for the following settings:
| Setting | Value |
| Name of peering from VNet1 to VNet2 | gits-Vnet1-gits-VNet2 |
| Peer details | Resource Manager |
| Subscription | Select the subscription of the virtual network you want to peer with. One or more subscriptions are listed, depending on how many subscriptions your account has read access to |
| virtual network |
gits-VNet2 (GITSResourceGroup) |
| Name of peering from VNet2 to VNet1 | gits-Vnet2-gits-VNet1 |
Leave the rest as default and select OK.
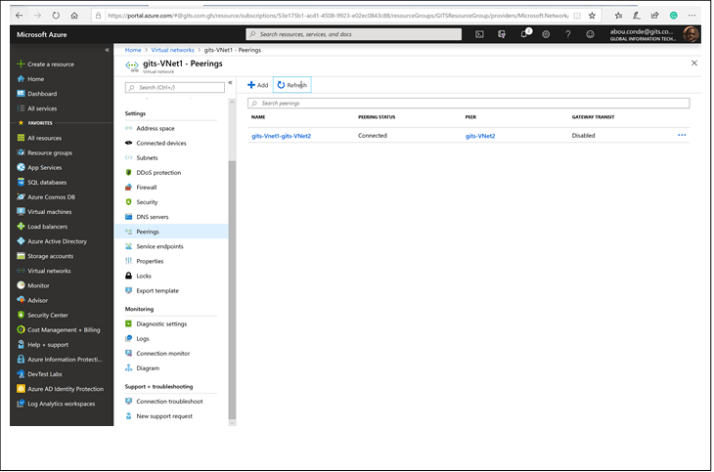
Once completed this VNet peering link is created, you can see the status of VNet peering updated to “Connected”.


One thought on “Configuring VNet Peering using the Azure portal”