Public Load balancer Overview
Load balancing provides a higher level of availability and scale by spreading incoming requests across virtual machines (VMs). You can use the Azure portal to create a load balancer and balance traffic among VMs.
This blog post shows you how to configure the different components of the Azure Standard Load Balancer that distribute internet traffic to VMs and provide high availability.
Create backend servers
I have already created a virtual network, two virtual machines for the backend pool of the Load Balancer, and then install IIS on the virtual machines to help test the Load Balancer.

Create a Standard Load Balancer
Standard Load Balancer only supports a Standard Public IP address. When you create a Standard Load Balancer, you must also create a new Standard Public IP address that is configured as the frontend (named as LoadBalancerFrontend by default) for the Standard Load Balancer.
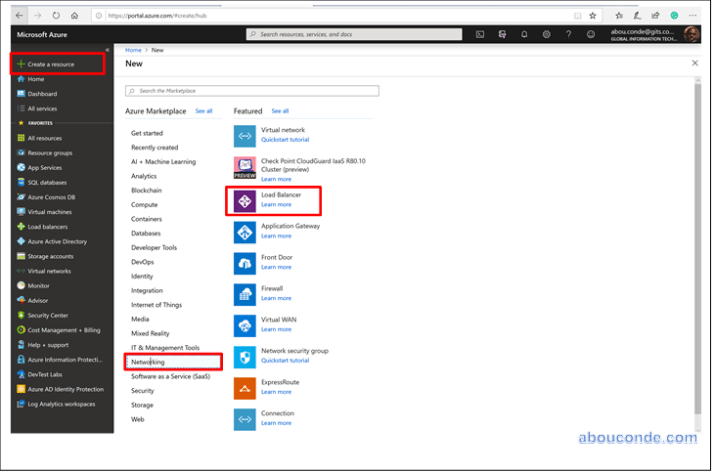
On the top left-hand side of the screen, click Create a resource > Networking > Load Balancer.
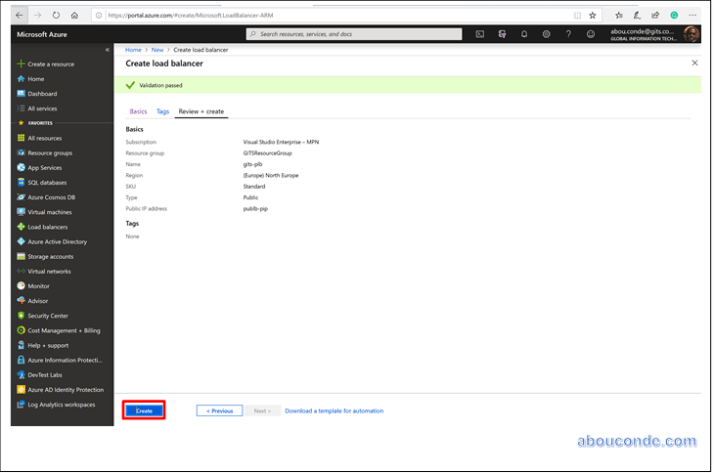
In the Basics tab of the Create load balancer page, enter or select the following information, accept the defaults for the remaining settings,
and then select Review + create:
| Setting | Value |
| Subscription | Select your subscription. |
| Resource group | Select Create new and type GITSResourceGroup in the text box. |
| Name | gits-plb |
| Region | Select West Europe. |
| Type | Select Public. |
| SKU | Select Standard. |
| Public IP address | Select Create new. |
| Public IP address name | Type publb-pip in the text box. |
| Availability zone | Select Zone redundant. |

In the Review + create tab, click Create.
Create Load Balancer resources
Configuring Load Balancer settings for a backend address pool, a health probe, and specify a balancer rule.
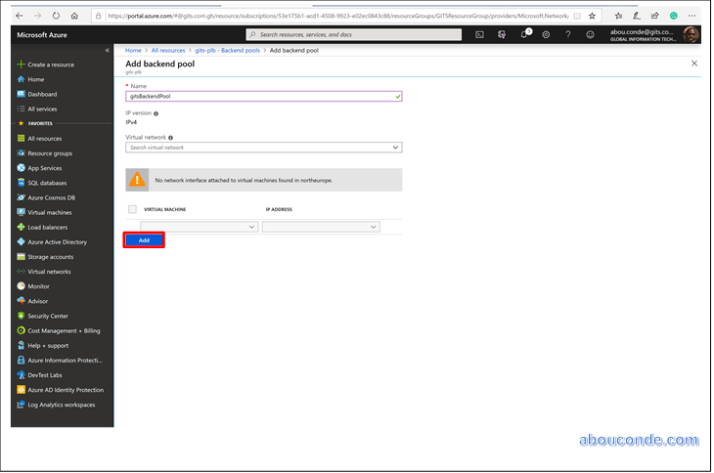
Create a backend address pool
To distribute traffic to the VMs, a backend address pool contains the IP addresses of the virtual (NICs) connected to the Load Balancer. Create the backend address pool myBackendPool to include virtual machines for load-balancing internet traffic.
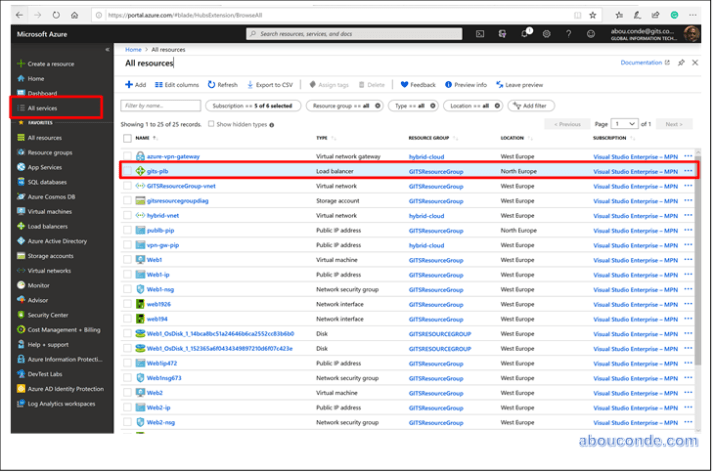
Select All services in the left-hand menu, select All resources, and then click gits-plb from the resources list.
Under Settings, click Backend pools, then click Add.

On the Add a backend pool page, for name, type gitsBackendPool, as the name for your backend pool, and then select Add.
Create a health probe
To allow the Load Balancer to monitor the status of your app, you use a health probe. The health probe dynamically adds or removes VMs from the Load Balancer rotation based on their response to health checks. Create a health probe gitsHealthProbe to monitor the health of the VMs.
Under Settings, click Health probes, then click Add.

Use these values to create the health probe:
| Setting | Value |
| Name | Enter gitsHealthProbe. |
| Protocol | Select HTTP. |
| Port | Enter 80. |
| Interval | Enter 15 for number of Interval in seconds between probe attempts. |
| Unhealthy threshold | Select 2 for number of Unhealthy threshold or consecutive probe failures that must occur before a VM is considered unhealthy. |
| Health probe | Select gitsHealthProbe. |
Select OK. 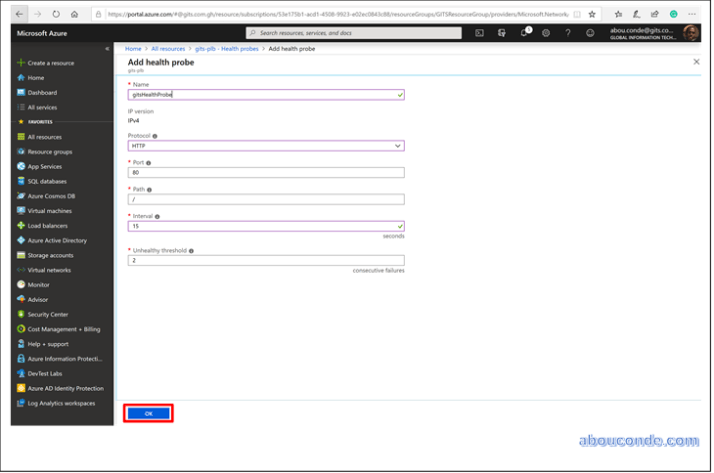
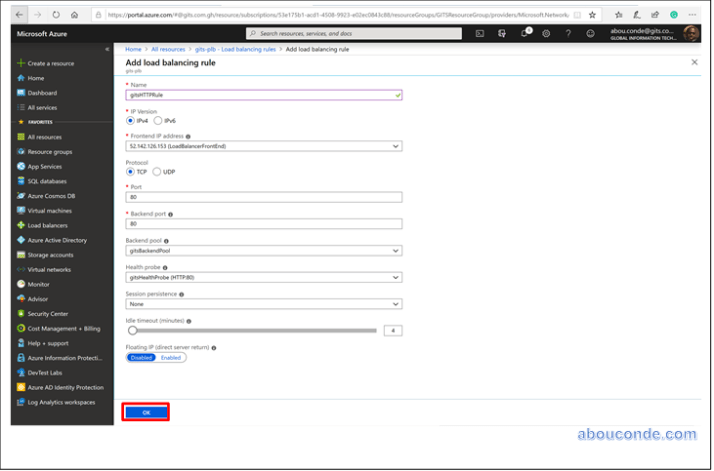
Create a Load Balancer rule
A Load Balancer rule is used to define how traffic is distributed to the VMs. You define the frontend IP configuration for the incoming traffic and the backend IP pool to receive the traffic, along with the required source and destination port. Create a Load Balancer rule gitsLoadBalancerRuleWeb for listening to port 80 in the frontend FrontendLoadBalancer and sending load-balanced network traffic to the backend address pool gitsBackEndPool also using port 80.
Under Settings, click Load balancing rules, then click Add.
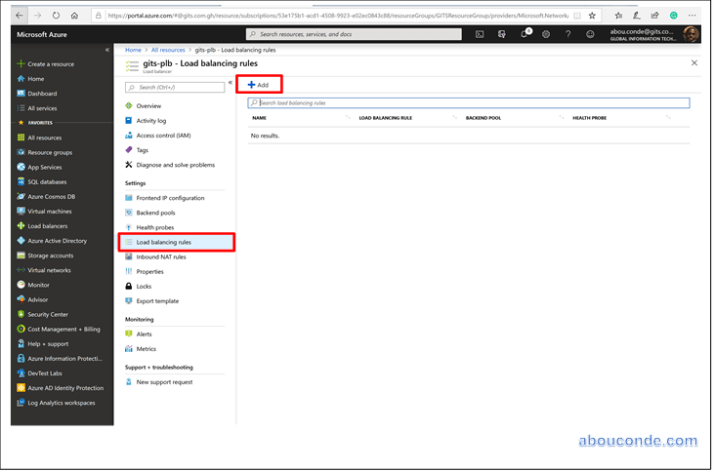
Use these values to configure the load-balancing rule:
| Setting | Value |
| Name | Enter gitsHTTPRule. |
| Protocol | Select TCP. |
| Port | Enter 80. |
| Backend port | Enter 80. |
| Backend pool | Select gitsBackendPool. |
| Health probe | Select gitsHealthProbe. |
Leave the rest of the defaults and select OK.