
Public IP addresses Overview
Public IP addresses allow Internet resources to communicate inbound to Azure resources. Public IP addresses also enable Azure resources to communicate outbound to Internet and public-facing Azure services with an IP address assigned to the resource. The address is dedicated to the resource, until it is unassigned by you. If a public IP address is not assigned to a resource, the resource can still communicate outbound to the Internet, but Azure dynamically assigns an available IP address that is not dedicated to the resource.
Sign in to Azure
Sign in to the Azure portal at https://portal.azure.com.
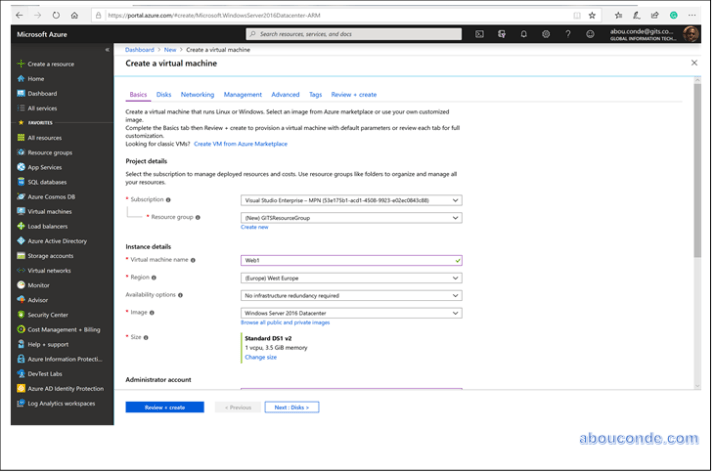
On Create a resource found on the upper, left corner of the Azure portal, Select Compute, and then select Windows Server 2016 VM, or another operating system of your choosing.

Enter, or select, the following information, accept the defaults for the remaining settings, and then select OK:
| Setting | Value |
| Name | Web1 |
| User name | Enter a user name of your choosing. |
| Password | Enter a password of your choosing. The password must be at least 12 characters long and meet the defined complexity requirements. |
| Subscription | Select your subscription. |
| Resource group | Select Use existing and select GITSResourceGroup. |
| Location | Select West Europe |
Select a size for the VM.
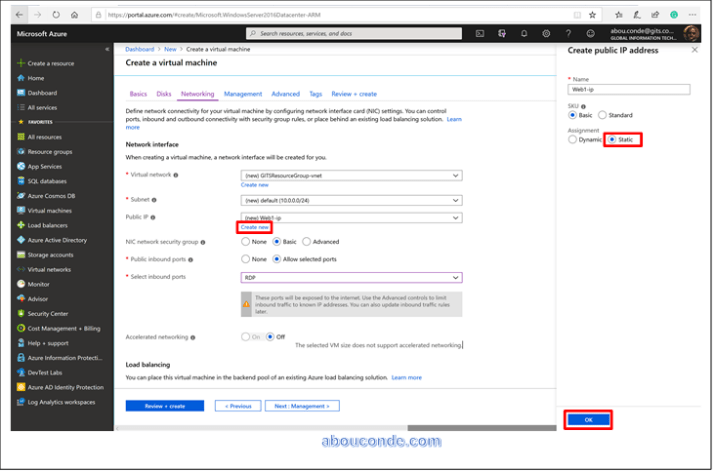
On Networking tab, for Public IP click “Create new”. Under assign, select Static. Click OK.
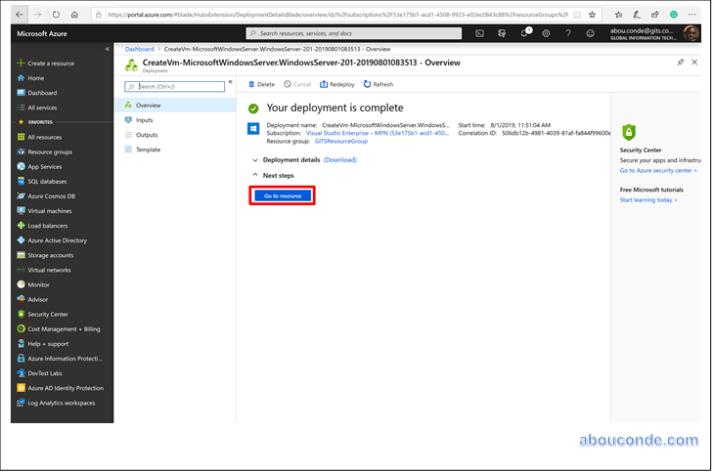
On the Summary page, select Create. The virtual machine takes a few minutes to deploy.

Now that the virtual machine is deployed, click Go to resource
You can view the public IP address that is assigned, and that the address is assigned to the Web1 virtual machine

