The MARS agent is used by Azure Backup to back up data from on-premises machines and Azure VMs to a backup Recovery Services vault in Azure. The MARS agent can be used as follows: Run the agent on on-premises Windows machines so that they can back up directly to a backup Recovery Services vault in Azure. Run the agent on Windows Azure VMs so that it can back up directly to a vault.
This blog post shows how to Set up MARS agent to back up your Windows 10 Machine.
Follow the steps below to create a Recovery Services vault in the Azure portal.
Deploying a Recovery Services Vault in the Azure portal
Once your vault is created, it appears in the list of Recovery Services vaults.
Log in to Azure
Log in to the Azure portal at https://portal.azure.com.
Click All services and in the Filter, type Recovery Services Vault, and then click Recovery Services Vault.

Click Recovery Services Vault

Download Recovery Services agent
From the list of Recovery Services vaults, select GITSRecoveryServicesVault to open its dashboard.
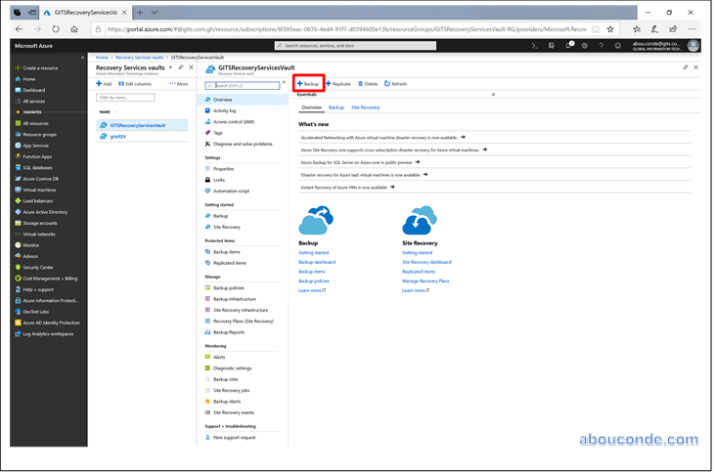
On the vault dashboard menu, click Backup.
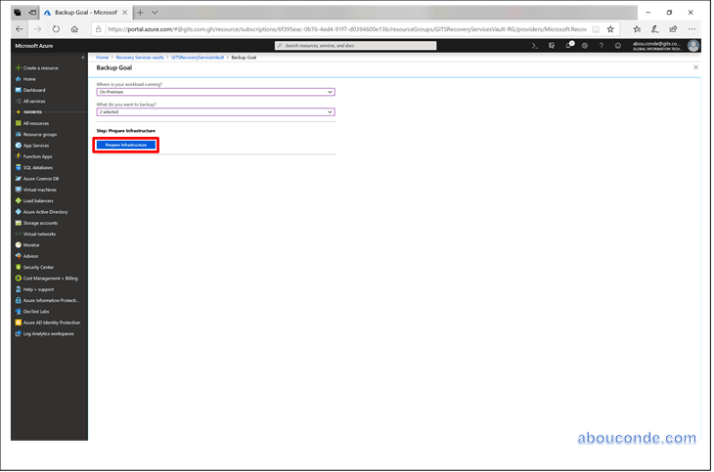
On the Backup Goal menu:
- for Where is your workload running?, select On-premises,
- for What do you want to backup?, select Files and folders and System State

Click Prepare Infrastructure to open the Prepare infrastructure menu.
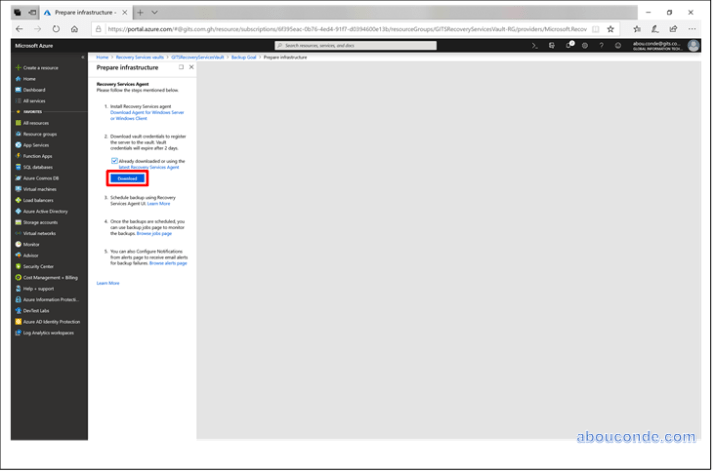
On the Prepare infrastructure menu, click Download Agent for Windows Server or Windows Client to download the MARSAgentInstaller.exe.
The installer opens a separate browser and downloads MARSAgentInstaller.exe.

Before you run the downloaded file, on the Prepare infrastructure menu click Download and save the Vault Credentials file. Vault credentials are required to connect the MARS Agent with the Recovery Services vault.