A resource group is a container that holds related resources for an Azure solution. The resource group can include all the resources for the solution, or only those resources that you want to manage as a group. You decide how you want to allocate resources to resource groups based on what makes the most sense for your organization. Generally, add resources that share the same lifecycle to the same resource group so you can easily deploy, update, and delete them as a group.
The resource group stores metadata about the resources. Therefore, when you specify a location for the resource group, you are specifying where that metadata is stored. For compliance reasons, you may need to ensure that your data is stored in a particular region.
This blog post shows how to create and delete a Resource Group in Azure
Create resource group
Sign in to the Azure portal at https://portal.azure.com with your Azure account.
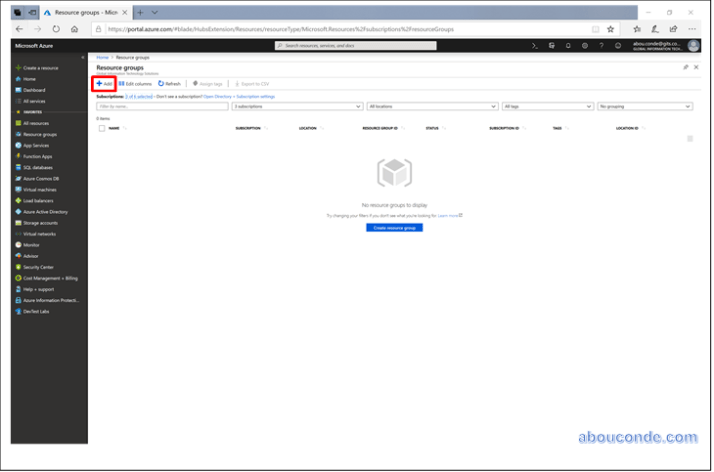
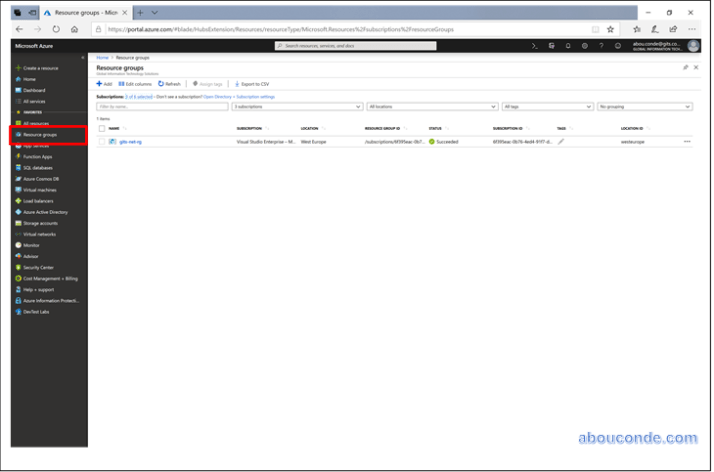
On the left pane of the dashboard, click Resource Groups

On the Resource groups pane, click Add
Enter your Subscription, Resource Group Name, Location and Click Create
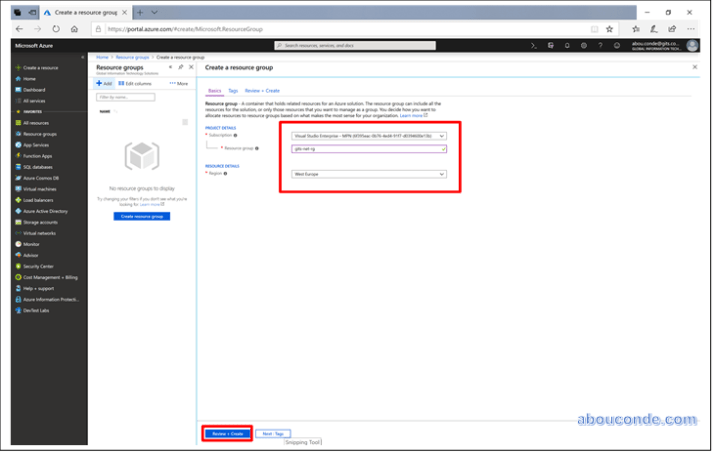
Review Resource Group Summary and Click Create

Creating resource group ‘gits-net-rg’ in subscription ‘Visual Studio Enterprise – MPN’ succeeded.
Delete resource group or resources
Deleting a resource group deletes all the resources contained within it. You can also delete individual resources within a resource group.
Use caution when deleting a resource group. That resource group might contain resources that resources in other resource groups depend on.
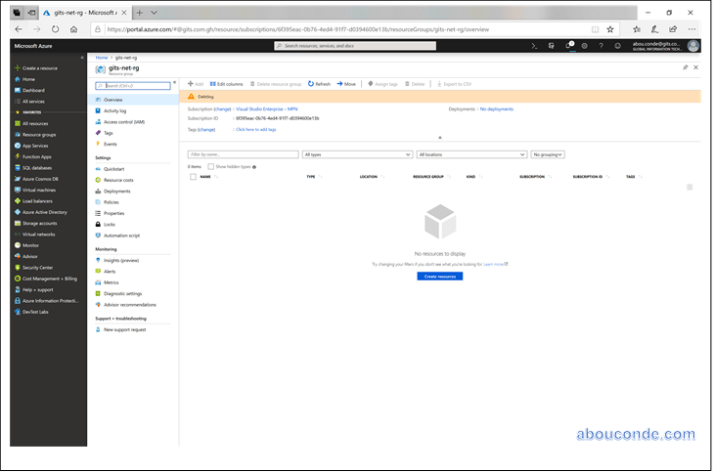
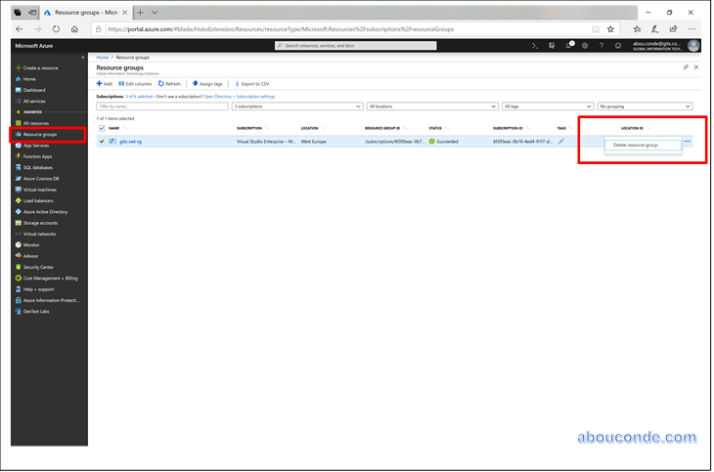
On Resource Groups, select the Resource Group you want to delete and click Delete resource group
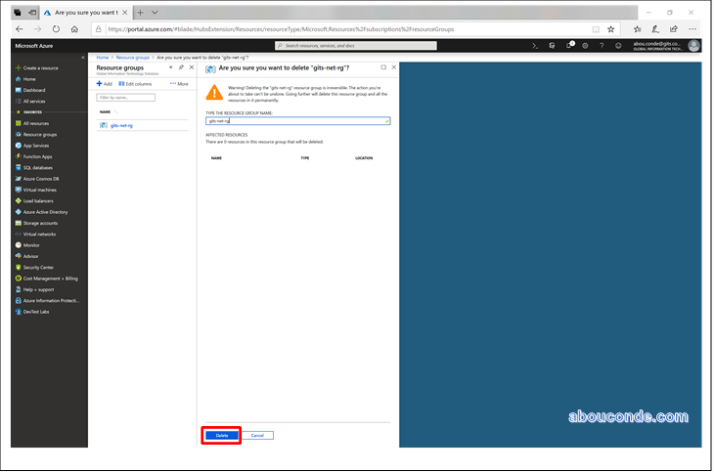
Type the Resource Group Name to confirm and Click Delete
Deleting