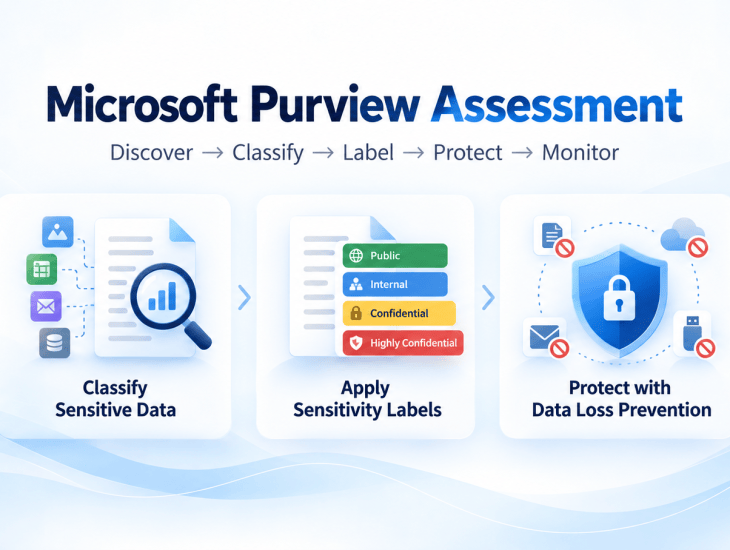
Microsoft Purview projects should not begin with DLP rules.
Before implementing policies, organizations need to understand their data, classify it correctly, define how it should be protected, and only then introduce enforcement.
Microsoft’s current Purview direction reinforces that approach. The new Classifiers experience brings multiple classification technologies together in one place, including Sensitive Information Types, Exact Data Match, Trainable Classifiers, Document Fingerprinting, named entities, credential classifiers, and OCR-related classification capabilities. Microsoft Learn
A practical Purview implementation lifecycle is:
Discover → Classify → Label → Protect → Monitor → Investigate → Secure AI → Improve
1. Start with discovery and assessment
The first question should not be:
“Which DLP policy should we create?”
The first question should be:
“Where is our sensitive data, who has access to it, and how is it being used?”
Start by identifying the main data locations:
- Exchange Online
- SharePoint Online
- OneDrive
- Microsoft Teams
- Windows endpoints
- on-premises repositories
- Fabric and Power BI
- cloud applications
- Microsoft 365 Copilot and AI scenarios
Data Security Posture Management can also help identify risks such as oversharing, excessive permissions, and sensitive information that could become exposed through AI. Microsoft positions data risk assessments in DSPM as a way to discover and remediate oversharing before it becomes a larger security problem. Microsoft Learn
The output of this phase should be a clear picture of:
- sensitive-data locations;
- business owners;
- access patterns;
- external sharing;
- high-risk data;
- existing protection mechanisms;
- gaps requiring remediation.
2. Build the classification foundation
Once you understand the data, determine how Purview should recognize it.
Microsoft Purview provides several classification technologies, and they should not all be used for the same purpose.
Sensitive Information Types — SITs
Use SITs when information has a recognizable pattern or structure.
Examples:
- credit card numbers;
- IBAN;
- national identifiers;
- account numbers;
- employee identifiers;
- custom business references.
SITs are usually the easiest place to start because Microsoft provides many built-in types and organizations can also create custom SITs. Microsoft Learn
SIT = pattern or structure
Exact Data Match — EDM
Use EDM when you already have a trusted reference dataset and need to identify specific known values.
Examples:
- actual customer IDs;
- employee IDs;
- contract references;
- proprietary business codes.
Instead of detecting anything that merely looks like a customer number, EDM can match against an organization’s actual reference data. This can significantly improve precision. Microsoft Learn
EDM = exact known data
Trainable Classifiers
Use Trainable Classifiers when sensitivity comes from the meaning of the document, not a fixed pattern.
Examples:
- strategic plans;
- financial reports;
- legal documents;
- HR documents;
- procurement content.
Microsoft describes trainable classifiers as machine-learning-based classifiers that identify unstructured content by meaning and context. Microsoft Learn
Trainable Classifier = meaning and context
Document Fingerprinting
Use Document Fingerprinting when documents are based on a known template.
Examples:
- loan applications;
- standard contracts;
- claims forms;
- onboarding forms;
- internal business templates.
Purview can recognize documents that are variations of the original template. Microsoft Learn
Document Fingerprinting = known template
Microsoft’s own classifier deployment guidance follows the same general progression:
SITs → EDM → Trainable Classifiers → Document Fingerprinting. Microsoft Learn
3. Create a classification matrix
After identifying the appropriate classifier technologies, map them to the organization’s business data.
For example:
| Business data | Detection method | Sensitivity label | Protection / control |
|---|---|---|---|
| Public information | Manual labeling | Public | Standard access controls |
| General internal documents | Manual labeling | Internal | DLP / sharing controls |
| Customer identifiers | SIT / EDM | Confidential | DLP, auto-labeling |
| Strategic reports / legal documents | Trainable Classifier | Confidential | Auto-labeling, DLP |
| Highly sensitive executive, financial, M&A or regulated data | EDM / Trainable Classifier / SIT | Highly Confidential | Stronger DLP, restricted sharing, access controls, auto-labeling where appropriate |
| Standard highly sensitive forms | Document Fingerprinting | Highly Confidential | Auto-labeling, DLP, restricted access |
This matrix connects business requirements to technical implementation.
4. Design Information Protection
Now define the sensitivity-label model.
A simple organization might use:
Public → Internal → Confidential
For each label, define:
- business meaning;
- who should use it;
- external-sharing rules;
- visual markings;
- access restrictions;
- default behavior;
- downgrade requirements;
- auto-labeling scenarios.
Microsoft supports manual labeling, default labeling, mandatory labeling, client-side auto-labeling, and service-side auto-labeling as part of the Information Protection solution. Microsoft Learn
A label taxonomy should remain understandable. If users cannot easily distinguish between labels, the model is probably too complex.
5. Publish labels to a small pilot group
Do not deploy labels to everyone immediately.
Start with a controlled pilot.
Configure:
- published labels;
- default label;
- mandatory labeling;
- downgrade/removal justification;
- email behavior;
- document behavior.
Microsoft’s default Purview policy model itself includes a default label and justification when users remove or lower a classification. Microsoft Learn
6. Validate the Office experience
This step is critical and is often overlooked.
Test:
- Word Desktop
- Excel Desktop
- PowerPoint
- Outlook
- Office Online
- Citrix / VDI
- mobile, where relevant
Validate scenarios such as:
- default label application;
- mandatory labeling;
- downgrade justification;
- watermark/footer;
- label visibility;
- policy synchronization.
This is important because a policy may be correctly configured in Purview but behave differently depending on the Office client or delivery environment.
Microsoft notes that label changes can appear faster in Office for the web than in desktop clients and that replication across applications and services can take longer. Microsoft Learn
7. Implement DLP in Microsoft 365
Once classification and labeling are stable, introduce DLP.
Start with the core Microsoft 365 workloads:
- Exchange
- SharePoint
- OneDrive
- Teams
Microsoft Purview DLP can use SITs, sensitivity labels, retention labels, and in supported locations, trainable classifiers to identify sensitive content. Microsoft Learn
Start in simulation or audit mode rather than blocking immediately.
Measure:
- matches;
- false positives;
- legitimate business exceptions;
- user impact;
- external-sharing behavior.
A sensible progression is:
Visibility → Warning → Justification → Restriction → Blocking
8. Extend DLP beyond Microsoft 365
Modern Purview DLP is broader than Exchange, SharePoint, OneDrive, and Teams.
Microsoft currently supports DLP locations including:
- Devices
- On-premises repositories
- Fabric and Power BI
- Microsoft 365 Copilot
- Managed cloud apps
- Unmanaged cloud apps
- Non-Microsoft connected apps
- other supported application scopes. Microsoft Learn
Endpoint DLP
Endpoint DLP protects sensitive information when users interact with it on managed devices.
Examples:
- copying to USB;
- printing;
- clipboard;
- browser upload;
- movement to other locations or applications.
On-premises DLP
Purview can also apply DLP controls to supported on-premises repositories such as file shares and SharePoint repositories.
Microsoft documents actions including restricting access, changing permissions, and moving files to quarantine in supported on-premises repository scenarios. Microsoft Learn
Copilot DLP
Microsoft 365 Copilot is now a specific DLP location.
This allows organizations to apply data-protection controls to supported Copilot scenarios, including excluding sensitive content based on supported classification conditions. Microsoft Learn
Cloud applications
Purview also supports managed and unmanaged cloud application scenarios, allowing organizations to extend data protection beyond traditional Microsoft 365 workloads. Microsoft Learn
Fabric and Power BI
Fabric and Power BI can also participate in the Purview DLP architecture for analytics and business intelligence data. Microsoft Learn
9. Add monitoring and investigation capabilities
Protection is only one side of the solution.
A mature Purview implementation also needs the ability to understand what happened and investigate user activity.
Typical capabilities include:
- Audit
- Activity Explorer
- Content Explorer
- Insider Risk Management
- Communication Compliance
- eDiscovery
- Microsoft Defender integration
The objective is to answer questions such as:
- Who accessed the data?
- What action did they perform?
- Where was the data sent?
- Was the behavior expected?
- Does it require investigation or escalation?
10. Secure Copilot and AI usage
AI should not be treated as an isolated project.
Purview can apply many of the same classification and data-protection controls to Microsoft 365 Copilot and other AI scenarios.
Microsoft’s security guidance includes controls such as DLP for AI scenarios, Endpoint DLP for browser interactions, Insider Risk for risky AI usage, and Communication Compliance for AI-related communications. Microsoft Learn
The foundation remains the same:
If the organization does not understand and classify its data properly, it cannot protect that data effectively when AI starts consuming it.
11. Use DSPM continuously
DSPM should not appear only at the end of the project.
It can be useful:
- during assessment;
- before Copilot deployment;
- during remediation;
- after production rollout.
Use it to identify:
- sensitive data;
- oversharing;
- access exposure;
- AI-related risks;
- priority remediation areas. Microsoft Learn
DSPM becomes a continuous feedback loop rather than a one-time assessment.
12. Move from POC to production progressively
A Purview project should move through controlled deployment phases.
A practical model is:
Technical Pilot → Extended POC → Limited Production → Progressive Rollout → Full Production
For example:
Phase 1 — Technical pilot
3–5 users to validate configuration.
Phase 2 — Extended POC
10–20 users representing different business scenarios.
Phase 3 — Limited production
Selected business teams.
Phase 4 — Progressive rollout
Department-by-department or site-by-site deployment.
Phase 5 — Full production
Broader enforcement and operationalization.
The exact number of users is not the important part.
The important principle is:
Do not move to the next phase until the important issues from the previous phase are resolved or formally accepted.
Recommended Microsoft Purview Implementation Order
For a new Purview project, my preferred sequence is:
1. Assess with DSPM
Understand sensitive data, oversharing, access, and risk.
2. Build the classification layer
SITs → EDM → Trainable Classifiers → Document Fingerprinting.
3. Implement Information Protection
Sensitivity labels, publishing, defaults, mandatory labeling, downgrade controls, auto-labeling.
4. Validate client behavior
Desktop, web, Outlook, Citrix/VDI, and relevant mobile scenarios.
5. Implement Microsoft 365 DLP
Exchange, SharePoint, OneDrive, Teams.
6. Extend DLP coverage
Endpoints, on-premises repositories, Copilot, cloud applications, Fabric and Power BI.
7. Implement monitoring and investigation
Audit, Insider Risk, Communication Compliance, Activity Explorer, eDiscovery.
8. Secure AI usage
Apply classification, DLP, endpoint, risk, and investigation controls to Copilot and other AI scenarios.
9. Continuously improve the posture
DSPM, reporting, policy tuning, governance, and remediation.
10. Scale progressively
Pilot → POC → production waves → enterprise adoption.
Conclusion
Microsoft Purview should not be implemented as a collection of unrelated security features.
The strongest implementations begin with data discovery and classification, then introduce labeling and protection, validate how those controls behave for users, and progressively expand into DLP, endpoints, AI, investigations, and continuous posture management.
The architecture can be summarized simply:
Discover → Classify → Label → Protect → Monitor → Investigate → Secure AI → Improve → Scale
That is how a Purview project moves from a technical POC to a sustainable enterprise data-security program.

