
Overview
Nested virtualization enables you to create virtual machines within a virtual machine it’s done through Hyper-V, and is only available on Windows VMs.
Now not only you can create a Hyper-V container with Docker, but also by running nested virtualization, you can create a VM inside a VM. Such nested environment provides great flexibility in supporting your needs in various areas such as development, testing, customer training, demo, etc.
For example, suppose you have a testing team using Hyper-V hosts on-prem today. They can now easily move their workloads to Azure by using nested VMs as virtualized test machines. The nested VM hosts will be used to replace physical Hyper-V hosts, individual testing engineer will have full control over the Hyper-V functionality on their own assigned VM Host in Azure.
Create a nesting capable Azure VM
Azure VM Sizes that support Nested Virtualization. These SKUs are hyper-threaded, nested capable VMs:
Create a resource group and a virtual network
There are a handful of steps you have to walk through to get your resource group and virtual network configured.
Before you can create a virtual network, you have to create a resource group to host the virtual network.
To start working with Azure PowerShell, sign in with your Azure credentials.
Connect-AzAccountCreate the resource group
New-AzResourceGroup -Name myNested -Location EastUS
Create a new Virtual Network with the following configuration
- VNet Address Space: 192.168.0.0/16
- Subnet 1
- Name: NAT
- Address Space: 192.168.0.0/24
- Subnet 2
- Name: Hyper-V-LAN
- Address Space: 192.168.1.0/24
Create a virtual network using the Azure portal
Sign in to the Azure portal.
From the Azure portal menu, select Create a resource. From the Azure Marketplace, select Networking > Virtual network.

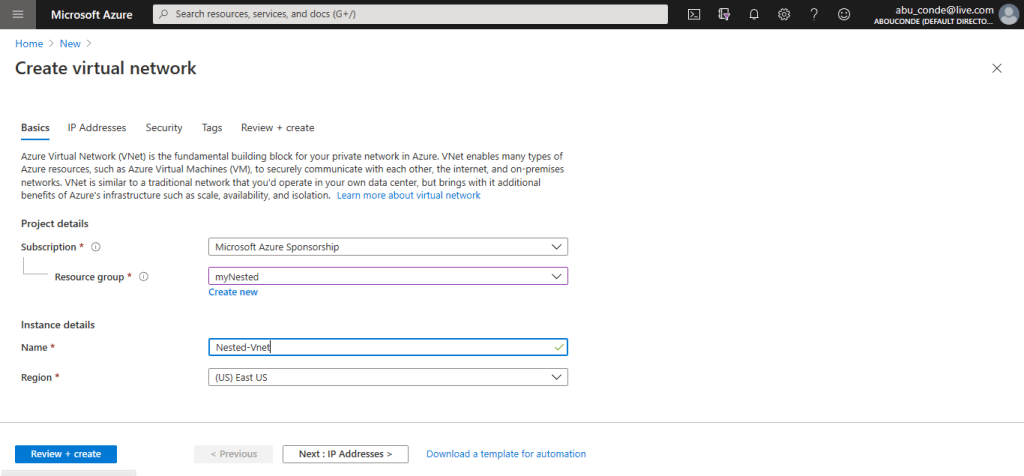
In Create virtual network, enter or select this information
Select Next: IP Addresses, and for IPv4 address space, enter 192.168.0.0/16
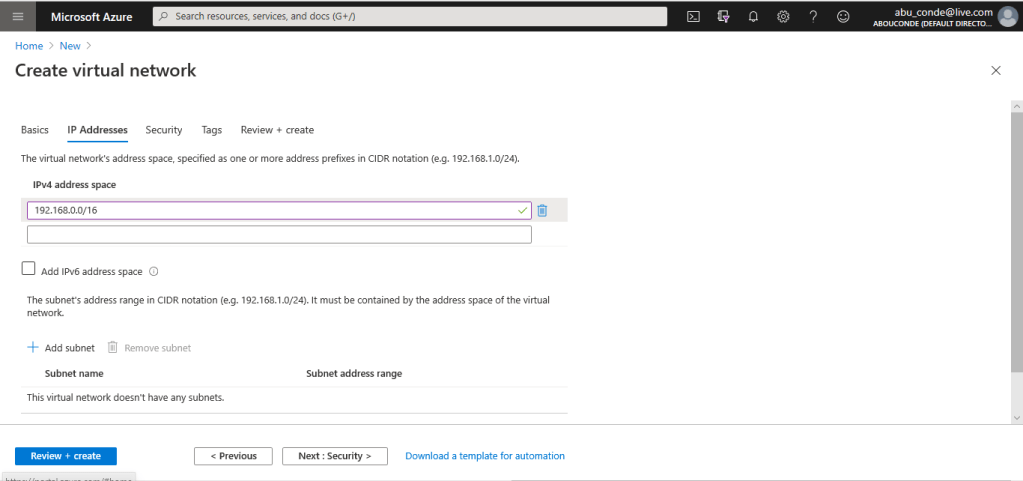
Select Add subnet, then enter NAT for Subnet name and 192.168.0.0/24, Hyper-V-LAN for Subnet name, and 192.168.1.0/ 24for Subnet address range.

In Create virtual network, select Create

Creating the Hyper-V Host VM
- Type virtual machines in the search.
- Under Services, select Virtual machines.
- In the Virtual machines page, select Add.
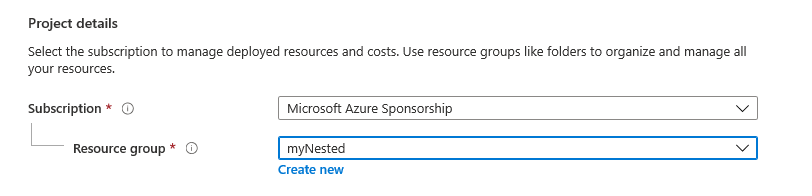
- In the Basics tab, under Project details, make sure the correct subscription is selected and then choose to Create new resource group. Type myNested for the name.
5.Under Instance details, type Host1 for the Virtual machine name and choose East US for your Region, and then choose Windows Server 2016 Datacenter for the Image. Leave the other defaults.

6.Under Administrator account, provide a username, such as azureuser and a password. The password must be at least 12 characters long and meet the defined complexity requirements.

7.Under Inbound port rules, choose Allow selected ports and then select RDP (3389) and HTTP (80) from the drop-down.

Move to the “Networking” tab
Ensure you’ve selected the NAT subnet for the VM
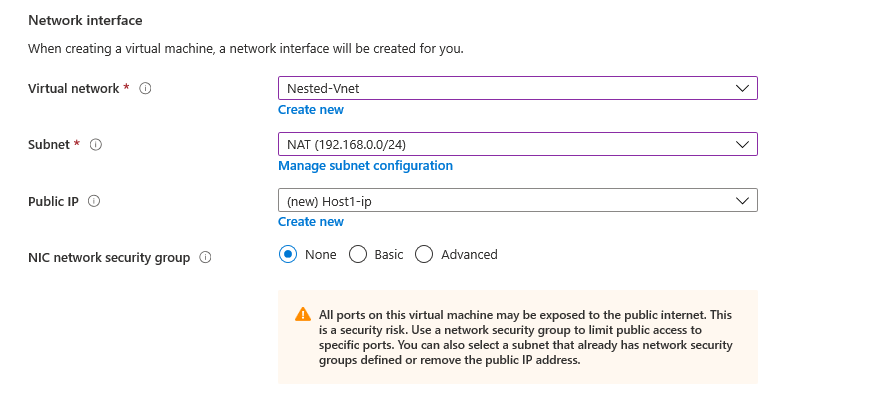
Go to “Review + create” and select “Create”

Create, change, or delete a network interface
PrimaryNIC
Select “NAT” for the subnet
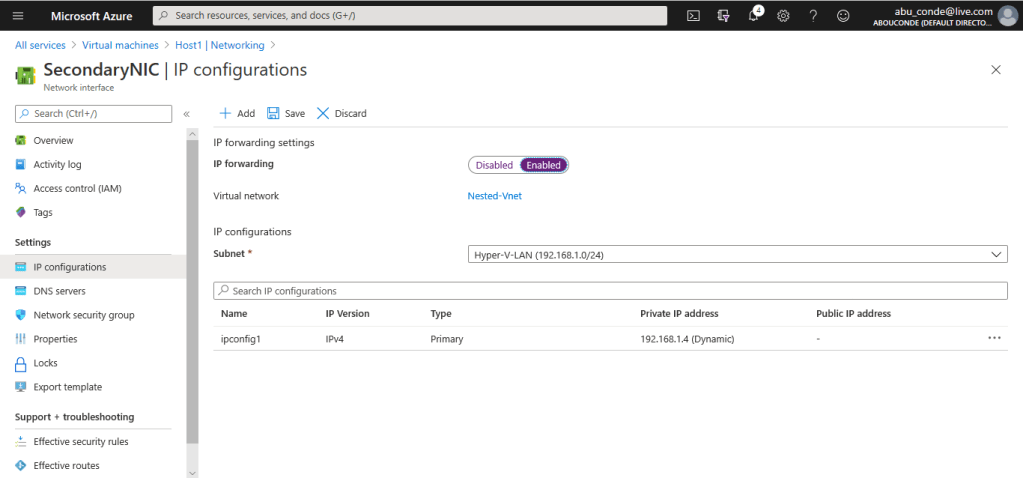
SecondaryNIC
Select “Hyper-V-LAN” for the subnet
- In the box that contains the text Search resources at the top of the Azure portal, type network interfaces. When network interfaces appear in the search results, select it.
- Select + Add under Network interfaces.
- Enter, or select values for the following settings, then select Create:

Create the second network interface

Primary vNIC and Secondary vNIC created

- Stop the VM
- Once stopped go to “Networking” under Settings
- “Attach network the 2 interfaces” PrimaryNIC and SecondaryNIC you previously created

- Go back to the “Overview” pane and Start your VM again once the previous action has completed
- Navigate to the second NIC we just created, you can find it in the Resource Group you selected previously
- Go to “IP configurations” and toggle “IP forwarding” to “Enabled” and then save the change
Enable the Hyper-V, DHCP, Routing (RRAS) on the Azure VM
On the Azure VM, open PowerShell as an Administrator.
Install-WindowsFeature -Name Hyper-V,DHCP,Routing -IncludeManagementTools -Restart
Set up internet connectivity for the guest virtual machine
Create an internal switch
New-VMSwitch -Name "InternalNAT" -SwitchType Internal

View the properties of the switch and note the ifIndex for the new adapter
Get-NetAdapter
Take note of the “ifIndex” for the virtual switch you just created
New-NetIPAddress -IPAddress 192.168.2.1 -PrefixLength 24 -InterfaceIndex 18
In PowerShell, create a new NAT network
New-NetNat -Name "InternalNat" -InternalIPInterfaceAddressPrefix 192.168.2.0/24Configure DHCP to dynamically assign an IP address to the guest virtual machine
Add-DhcpServerV4Scope -Name "Nested VMs" -StartRange 192.168.2.2 -EndRange 192.168.2.254 -SubnetMask 255.255.255.0
Set-DhcpServerV4OptionValue -DnsServer 168.63.129.16 -Router 192.168.2.1
Configuring Remote Access
3. Open Server Manager and select “Tools” and then select “Routing and Remote Access”.
4.On the left hand side of the Routing and Remote Access management panel you will see an icon with your servers name next to it, right click this and select “Configure and Enable Routing and Remote Access”.

- At the wizard select “Next”, select “Custom Configuration”, and then select “Next”.

- Check “NAT” and “LAN routing” and then select “Next” and then “Finish”. If it asks you to start the service, then do so.

- Now navigate to the “IPv4” node and expand it so that the “NAT” node is made available.

Right click “NAT”, select “New Interface…” and select “Ethernet”, this should be your first NIC with the IP of “192168.0.0.4” and select “Public interface,” connect to the Internet and Enable NAT on this interface.

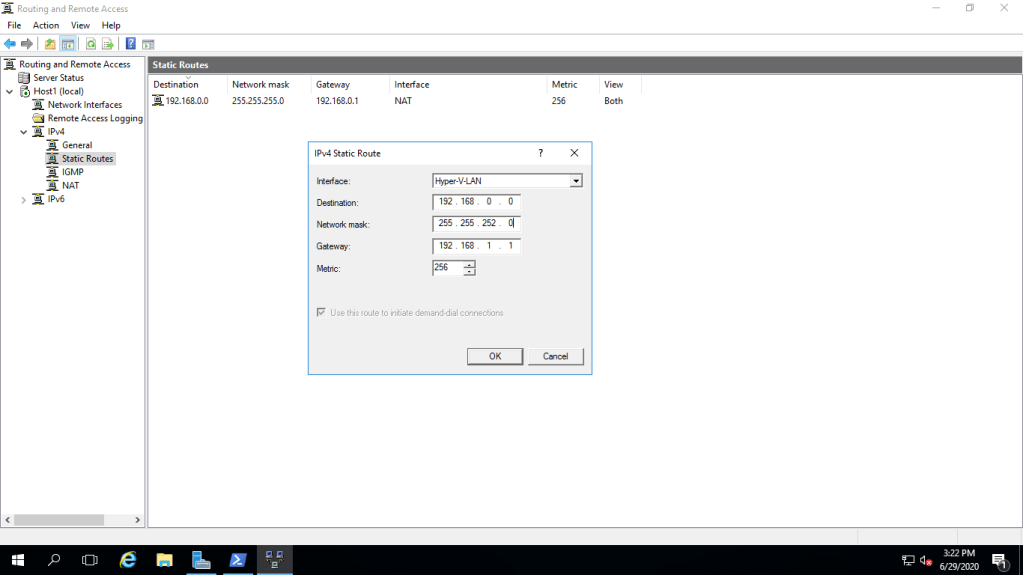
Now we need to create some static routes to force LAN traffic out of the second NIC. You do this by going to the “Static Routes” node under “IPv4”.
Route 1
- Interface: NAT
- Destination: 192.168.0.0
- Network Mask: 255.255.255.0
- Gateway: 192.168.0.1
- Metric: 256

Route 2
- Interface: Hyper-V-LAN
- Destination: 192.168.0.0
- Network Mask: 255.255.252.0
- Gateway: 192.168.1.1
- Metric: 256
Creating the routing table within Azure
#Create Route Table
$routeTableNested = New-AzRouteTable `
  -Name 'Routes-for-nested-VMs' `
  -ResourceGroupName myNested `
  -location EastUS

#Create route with nested VMs destination and Hyper-V host LAN IP as a next-hop
$routeTableNested  | Add-AzRouteConfig `
  -Name "Nested-VMs" `
  -AddressPrefix 192.168.2.0/24 `
  -NextHopType "VirtualAppliance" `
  -NextHopIpAddress 192.168.1.4 `
 | Set-AzRouteTable

#Associate the route table to the LAN subnet
 Get-AzVirtualNetwork -Name Nested-Vnet | Set-AzVirtualNetworkSubnetConfig `
 -Name 'Hyper-V-LAN' `
 -AddressPrefix 192.168.1.0/24 `
 -RouteTable $routeTableNested |Set-AzVirtualNetwork `
You should now be able to deploy a virtual machine (even a 32-bit VM!) to your Hyper-V host and have it be accessible from on-premises and within Azure.

Thank you for taking the time to post this article with the detailed steps. It was helpful in getting this setup for a project I’m working on!
LikeLiked by 1 person
As a follow-up, I found that inbound traffic to the nested VM wasn’t working. Azure Support directed me another blog – https://azurecloudai.blog/2019/12/16/how-to-enable-internet-and-vnet-connectivity-for-nested-vms-in-azure/.
It has nearly the same steps; however, they leave out the one PowerShell cmdlet below. When I removed the NetNat entry, inbound traffic started working immediately!
New-NetNat -Name “InternalNat” -InternalIPInterfaceAddressPrefix 192.168.2.0/24
LikeLike
I’m able to see nested VMs over site to site VPN. I can see the Azure VM but not the VMs running in Hyper-V. Did you say you removed NetNat and inbound traffic started working?
LikeLike