
This blog post shows how to back up Windows machines using the Azure Backup service and the Microsoft Azure Recovery Services (MARS) agent, also known as the Azure Backup agent.
Configure Backup and Retention
You use the Microsoft Azure Recovery Services agent to schedule when backups to Azure, occur on Windows 10 machines.
Execute the following steps on the Windows 10 machine where you downloaded the agent.
Follow the steps below to download the agent and install on Windows 10 machine
Installing the Azure Backup Agent on Windows 10 Machine
Open the Microsoft Azure Recovery Services agent. You can find it by searching your machine for Microsoft Azure Backup.

In the Recovery Services agent console, click Schedule Backup under the Actions Pane.

Click Next to navigate to the Select Items to Back up page.

Click Add Items and from the dialog box that opens, select System State and files or folders that you want to back up. Then click OK.

On the Specify Backup Schedule (System State) page, specify the time of the day, or week when backups need to be triggered for System State and click Next.

On the Select Retention Policy (System State) page, select the Retention Policy for the backup copy for System State and click Next.
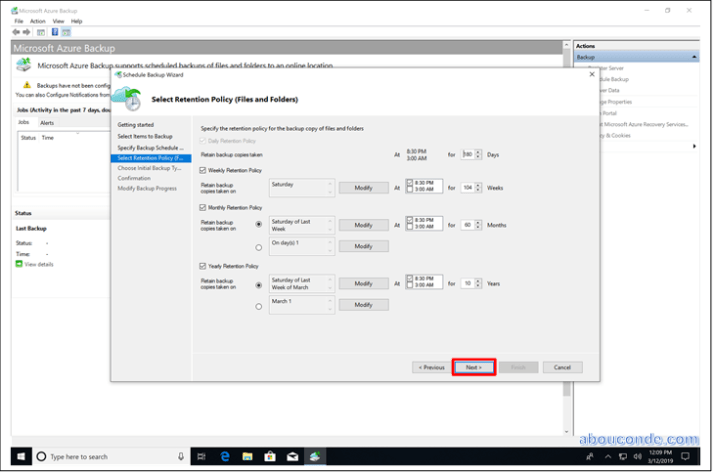
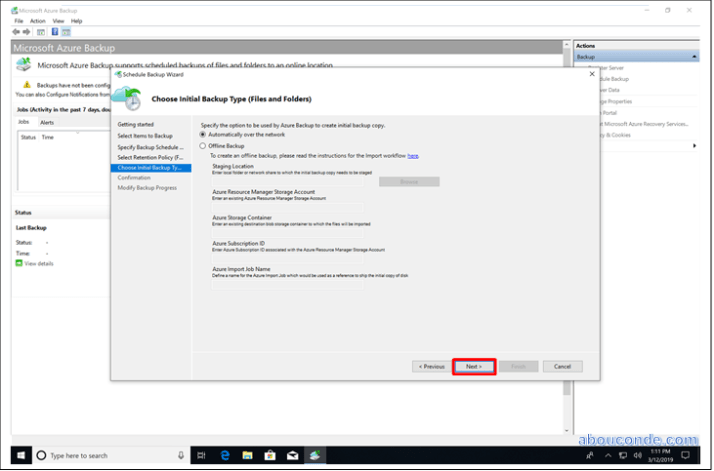
Similarly, select the backup schedule and retention policy for selected files and folders.
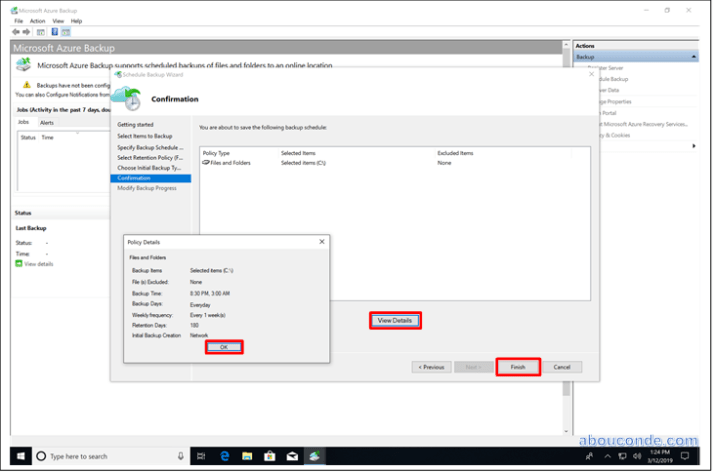
In Confirmation, review the information, and then click Finish.
After the wizard finishes creating the backup schedule, click Close.

Run an ad hoc backup.
You have established the schedule when backup jobs run. However, you have not backed up the Windows 10 machine.
It is a disaster recovery best practice to run an on-demand backup to ensure data resiliency for your Windows 10 machines.
In the Microsoft Azure Recovery Services agent console, click Back Up Now.

In Confirmation, review the settings, and click Back Up.

Click Close to close the wizard. If you do this before the backup finishes, the wizard continues to run in the background.
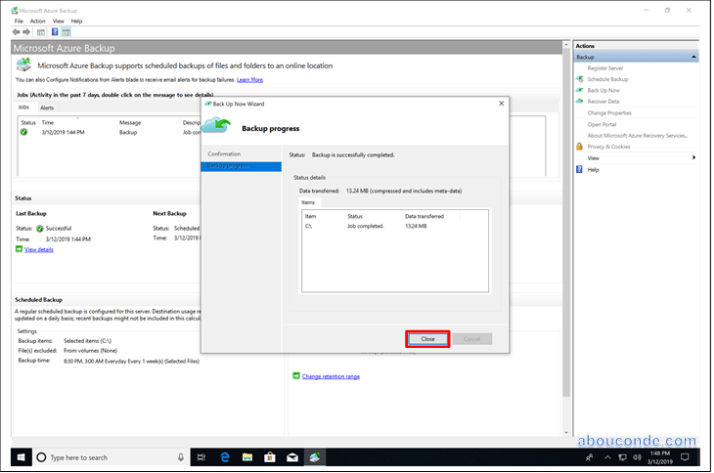
After the initial backup is completed, the Job completed status appears in the Backup console.

