Azure Storage Explorer is a standalone app that enables you to easily work with Azure Storage data on Windows, macOS, and Linux.
This blog post shows how to connect to your Azure storage account or service.
Prerequisites
Azure Storage Explorer is supported on the following versions of Windows:
- Windows 10 (recommended)
- Windows 8
- Windows 7
For all versions of Windows, .NET Framework 4.6.2 or greater is required.
Download and install Storage Explorer
Connect to a storage account or service
Storage Explorer provides several ways to connect to storage accounts. For example, you can:
- Connect to storage accounts associated with your Azure subscriptions.
- Connect to storage accounts and services that are shared from other Azure subscriptions.
- Connect to and manage local storage by using the Azure Storage Emulator.
Connect to an Azure subscription
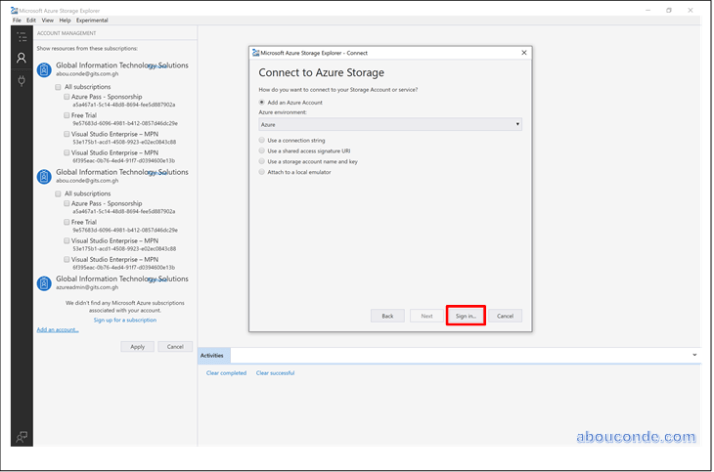
In Storage Explorer, select Manage Accounts to go to the Account Management Panel.
The left pane now displays all the Azure accounts you’ve signed in to. To connect to another account, select Add an account

If you want to sign into a national cloud or an Azure Stack, click on the Azure environment dropdown to select which Azure cloud you want to use. Once you have chosen your environment, click the Sign in… button.
After you successfully sign in with an Azure account, the account and the Azure subscriptions associated with that account are added to the left pane. Select the Azure subscriptions that you want to work with, and then select Apply (Selecting All subscriptions: toggles selecting all or none of the listed Azure subscriptions).

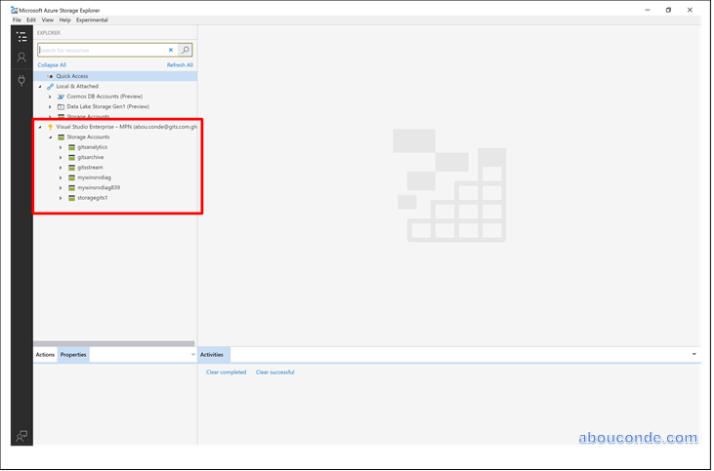
The left pane displays the storage accounts associated with the selected Azure subscriptions.