
By deploying an application, service, or component, you distribute it for installation on other computers, devices, servers, or in the cloud. You choose the appropriate method in Visual Studio for the type of deployment that you need. For many common app types, you can deploy your application right from Solution Explorer in Visual Studio.
This blog post shows how to deploy a web application to Azure Using Visual Studio.
Prerequisites
-
Visual Studio 2017 installed with the appropriate workloads for your language of choice:
-
- ASP.NET:
-
- Node.js:
-
An Azure subscription. If you do not already have subscription, sign up for free, which includes $200 in credit for 30 days and 12 months of popular free services.
Create a web app
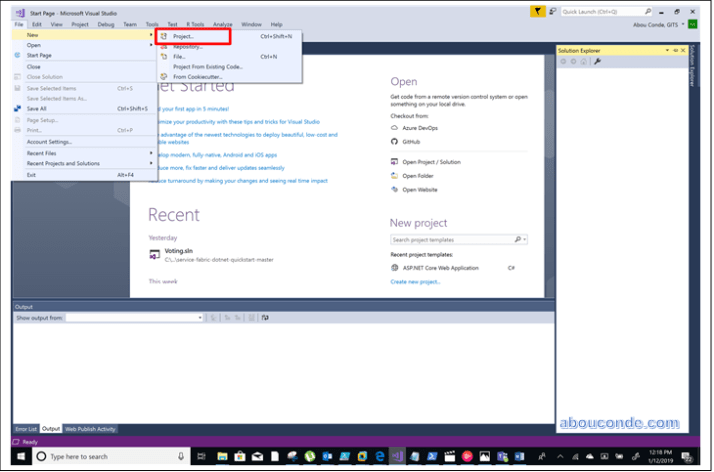
Open Visual Studio 2017 and go to File and select New Project
Complete the New Project dialog:
- In the left pane, select
- In the center pane, select
- select
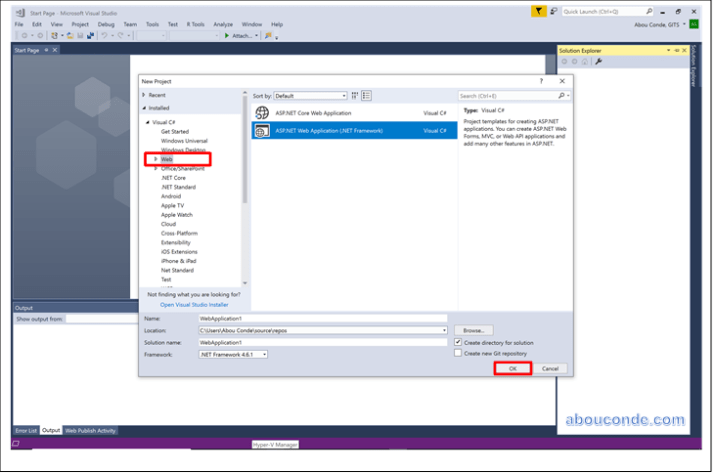
- Select
- select

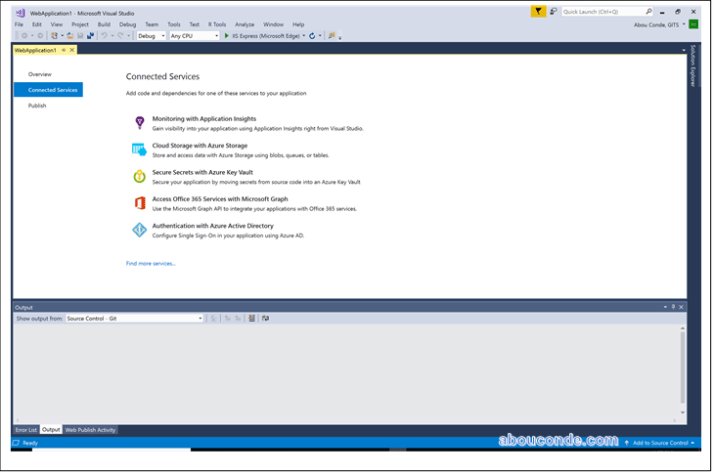
After opening an Application, we can see the first look, which looks as shown below. We can see three important menus on left side.

Connection Services
We can add code and dependencies for one of these Services to our Applications.
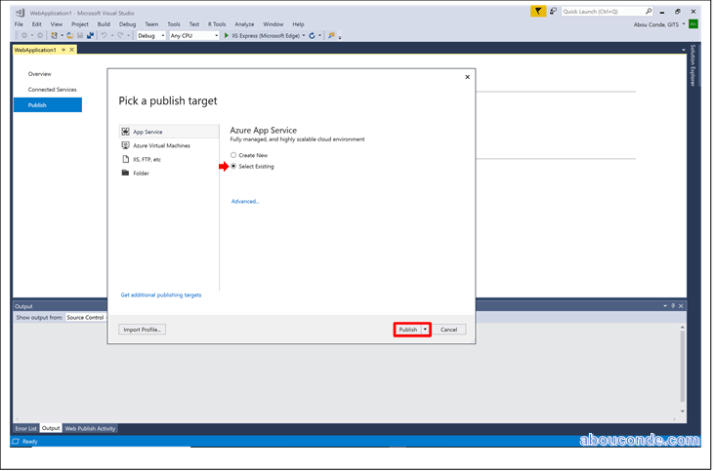
Publish to Azure
From within Visual Studio, applications can be published directly to the following targets:
- App Service
- Azure Virtual Machines
- Custom targets (IIS, FTP, etc.), which includes all arbitrary web servers.
- Folder
Select Existing Azure App Service, then Click Publish
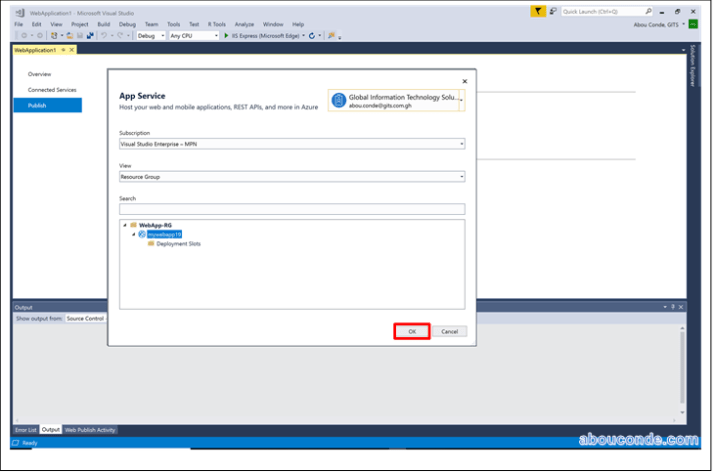
What we can do here is we can go to WebApp-RG and Select mywebapp19 then, click OK
This is the website I already build in the previous post.
Now is pushing the Application into the App Service Environment in our Web App

We can see the basic MVC application open up in the browse

