
Security rules in network security groups enable you to filter the type of network traffic that can flow in and out of virtual network subnets and network interfaces.
In this post, you will learn how to create a NSG, using Azure portal.
Log in to Azure
Log in to the Azure portal at https://portal.azure.com.
In the top-left corner of the portal, select + Create a resource.
Select Networking, then select network security group.

Enter, or select, the following information
| Setting | Value |
| Name | MyNSG |
| Subscription | Select your subscription. |
| Resource group | Select Create new and enter MyAppVNet. |
| Location | Select West Europe. |

Network security group successfully created

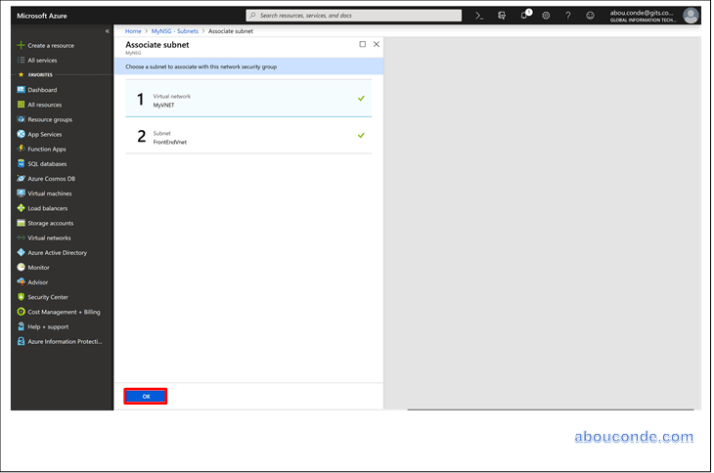
Associate network security group to subnet
In the Search resources, services, and docs box at the top of the portal, begin typing MyNSG. When MyNSG appears in the search results, select it.
Under SETTINGS, select Subnets and then select + Associate

Under Associate subnet, select Virtual network and then select MyVNET. Select Subnet, select FrontEndVnet, and then select OK.
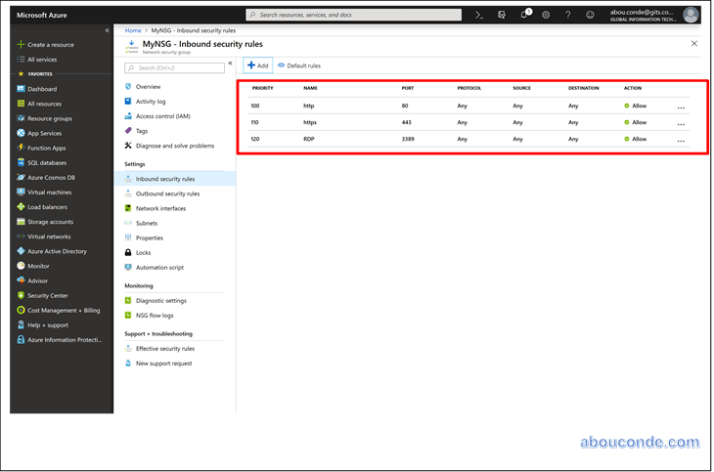
Create security rules
Under SETTINGS, select Inbound security rules and then select + Add,
Create a security rule that allows ports 80, 443 and 3389
Under Add inbound security rule, enter the following values,

One thought on “Create network security group NSG Using Azure Portal”