
Microsoft recognizes six different methods in which SCCM 2016 client can be installed.
You can use one, or any combination of these methods which are suitable for your environment needs.
Here are the following six methods
- Group Policy
- Manual
- Logon script
- Client push
- Software update point
-
Microsoft Intune
In this post I will take you through two different method of installation of SCCM 2016 Client.
- Group Policy
- Client push
Let’s start
1.Group policy installation
You need to create a new policy
On DC, click on Server Manager, click on Tools, click Group Policy Management.

Right click on domain and create a new policy,
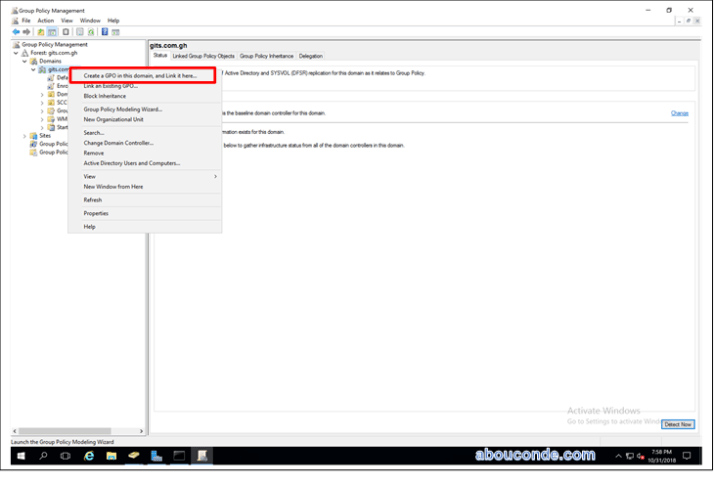
Name it as Install SCCM 2016 Client.

Right click on the policy that is created and click Edit.
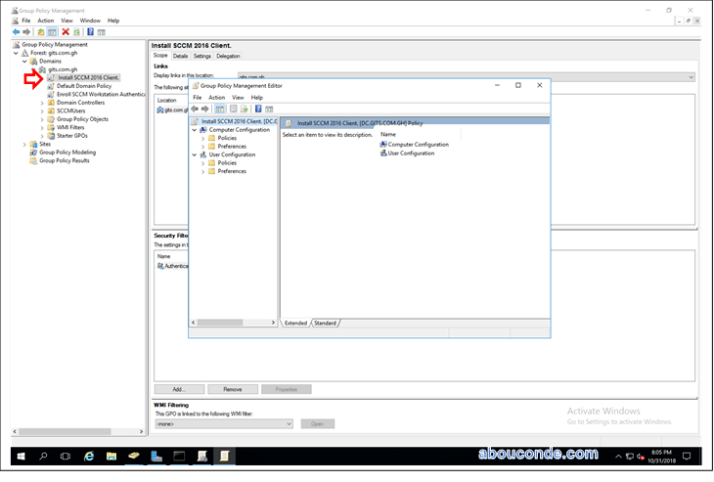
Expand Computer Configuration, Policies and right click on Administrative Templates and click on Add/Remove Templates.

This file can be found in the folder TOOLS\ConfigMgrADMTemplates on the Configuration Manager 2016 installation media.
You need to add ConfigMgrInstallation templates Click on Open.

Expand Administrative Templates, Classic Administrative Templates, Configuration Manager, Configuration Manager Client.
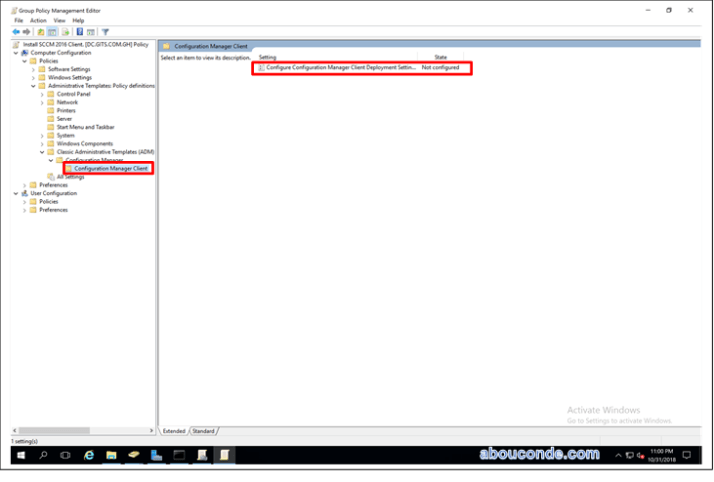
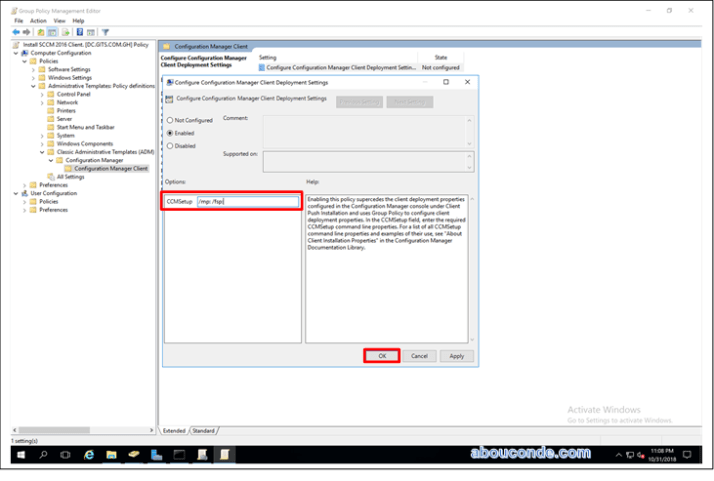
Right click Configure Configuration Manager 2012 Client Deployment Settings and click on Enabled.
Under options specify the installation properties for CCMSetup file. /mp: /fsp:
After configured the policie then you need to configure the SCCM 2016 Agent installation Software Package.
To configure the software Package, do the following steps:
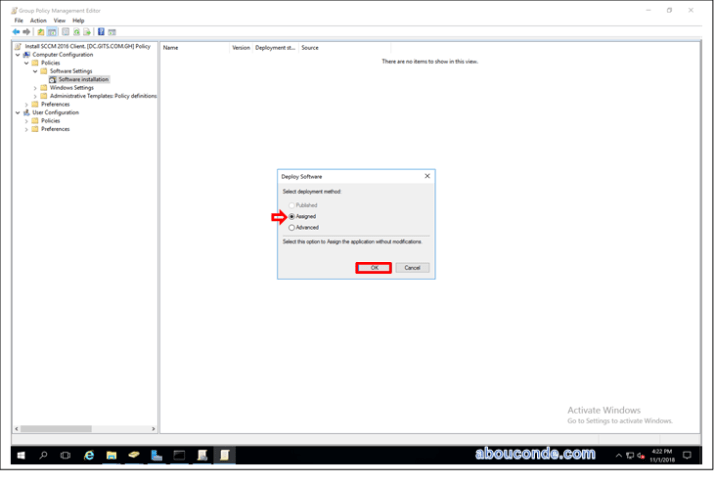
Under Computer Configuration expand Policies, Software Settings. Right click Software Installation and click New -> Package.

Use the Windows Installer package CCMSetup.msi for group policy-based installations.
This file is found in the folder <ConfigMgr installation directory>\bin\i386 on the site server.

Select the Deployment method as Assigned. Click OK;
When you click on Software installation you should see the name of the Package, its Version, Deployment Status and Source.
 You can now close the GPMC.
Reboot the Client machine and then SCCM client installation begins.
You can go to SCCM Console\Assets and Compliance\Devices and check newly installed client;

2.Client push installation
Configure the site to automatically use client push for discovered computers
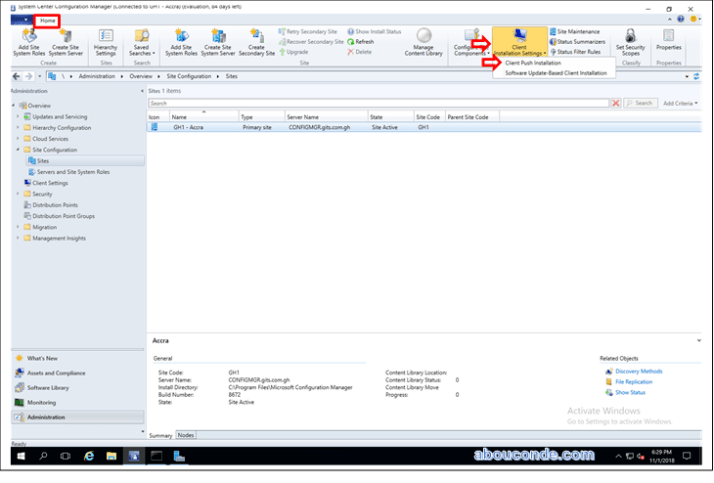
In the Configuration Manager console, go to the Administration workspace, expand Site Configuration, and select the Sites node.

On the Home tab of the ribbon, in the Settings group, choose Client Installation Settings, and select Client Push Installation.
On the General tab of the Client Push Installation Properties window, select Enable automatic site-wide client push installation.
Select the system types to which Configuration Manager should push the client software. Select whether you want to install the client on domain controllers.

On Accounts tab, specify one or more accounts for Configuration Manager to use when connecting to the target computer.
Click the Create icon, enter the User name and Password, confirm the password, and then click OK.

Complete the Installation Properties tab.

In the Configuration Manager console, go to the Assets and Compliance workspace.

In the Devices node, select a collection of computers in the Device Collections node.
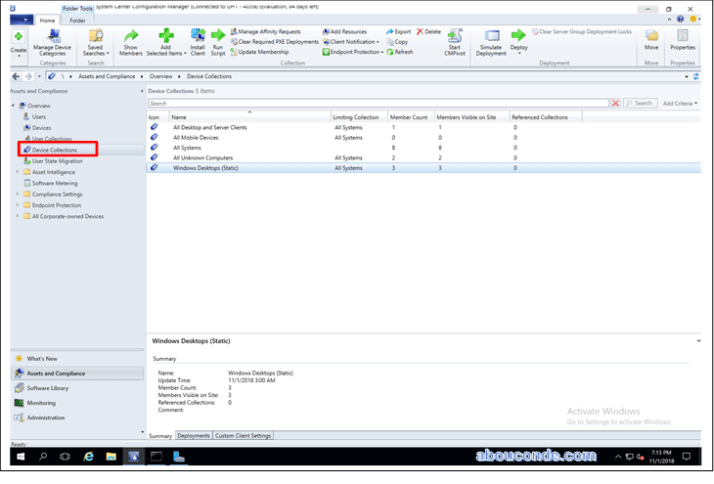
On the Home tab of the ribbon, choose
- To push the client to a collection of devices, in the Collection group, choose Install Client.
On the Install Configuration Manager Client wizard click on Next.

Click on Install the client software from a specified site and click on Next.

Click on Close.

