The following guide will take you through the installation of PKI Certificates on Windows Server 2016 for SCCM 2016.
This walkthrough, which uses a Windows Server 2016 certification authority (CA), contains procedures to guide you through the process of creating and configuring templates, Group Policies and public key infrastructure (PKI) certificates that Microsoft System Center Configuration Manager 2016 uses.
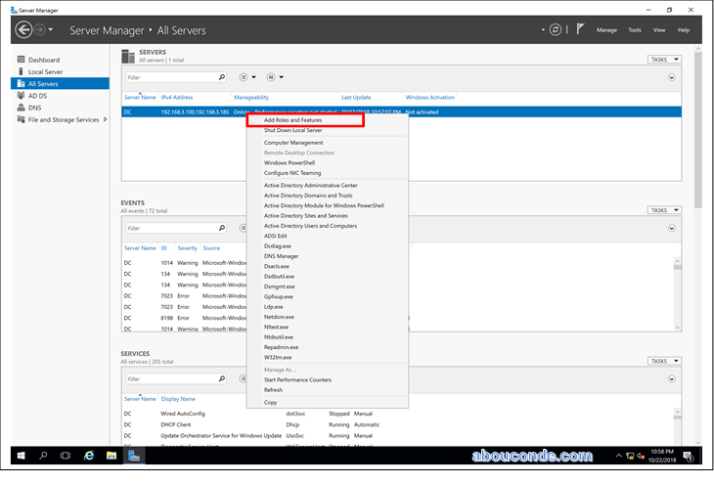
Open Server Manager, At All Servers and Add the Active Directory Certificate Services Role

Role-based or feature-based installation should be selected then click Next:


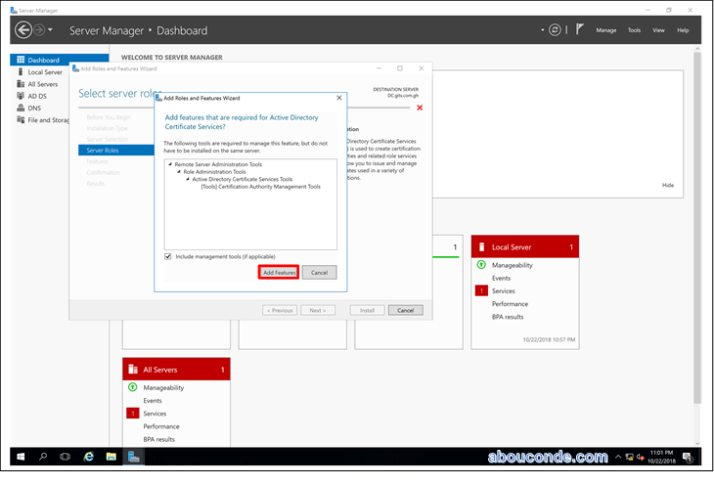
On the pop up window click the box Include management tools then Add Features:
Select Active Directory Certificate Services then click Next:

No additional Features are needed. Click Next:

Click Next:

Select Certification Authority and next

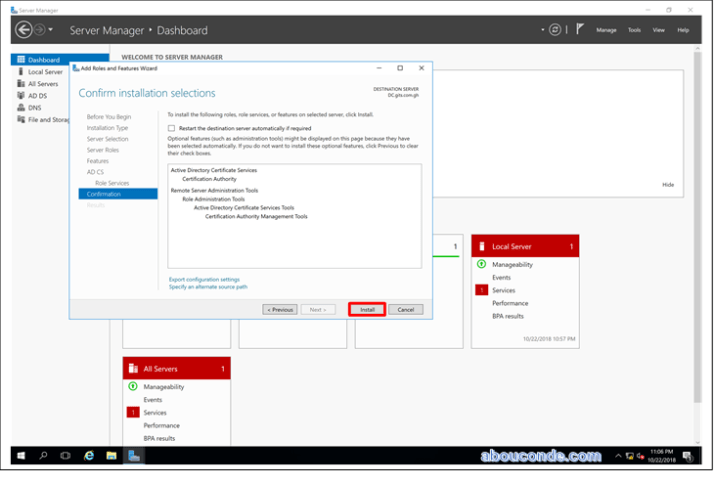
Click Install
Once the installation is complete click Close:

Select Certification Authority and next

Choose “Enterprise CA” on this step of the configuration wizard.

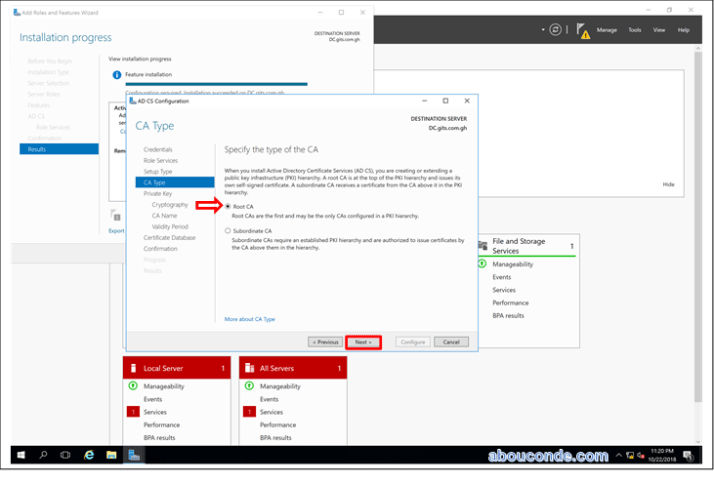
On this step choose “Root CA.
On this step select “Create new private key.

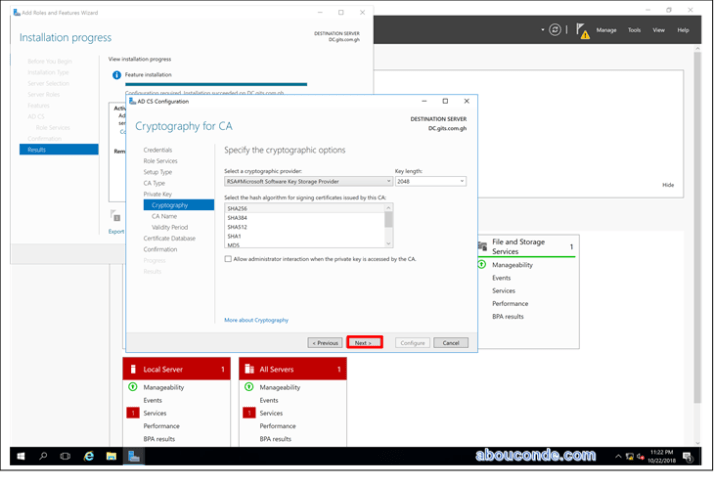
Enter your cryptographic options then click Next:
Give your certificate a name, and then click Next.

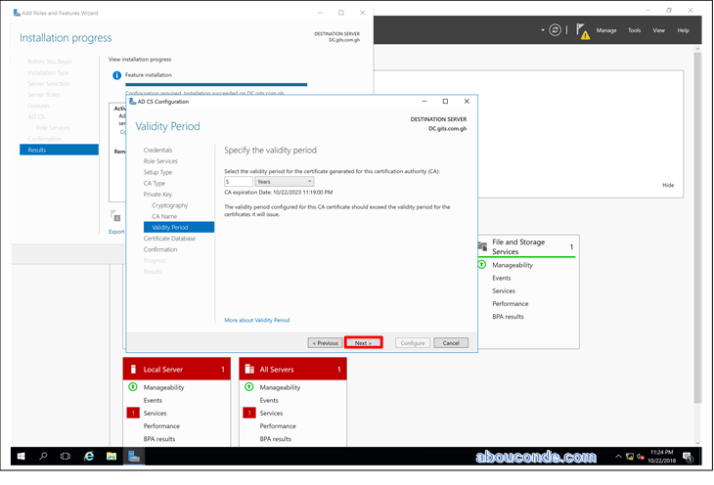
Select validity period
Click Next:

Ensure the summary is correct then click Configure:

Finished! Click Close:

Certification Authority:


At the Certification Authority console, right-click Certificate Templates and click Manage to load the Certificate Templates console.

At the results pane, right-click the entry that displays Web Server in the column Template Display Name, and then click Duplicate Template.

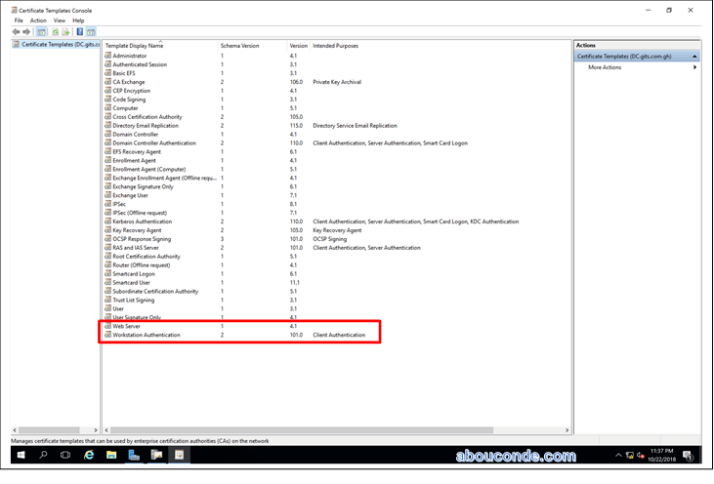
Now if you look at the Certificate Templates Console you will see our four new templates.


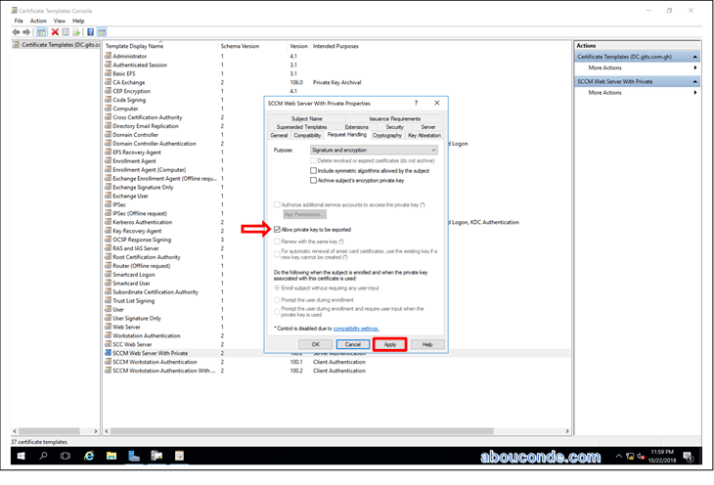
Click the Security tab, select the Domain Computers group, and select the additional permissions of Read and Autoenroll. Do not clear Enroll. Click Apply and OK

On the Request Handling tab select Allow private key to be exported.
At the Certification Authority console, right-click Certificate Templates, click New, and then click Certificate Template to Issue.

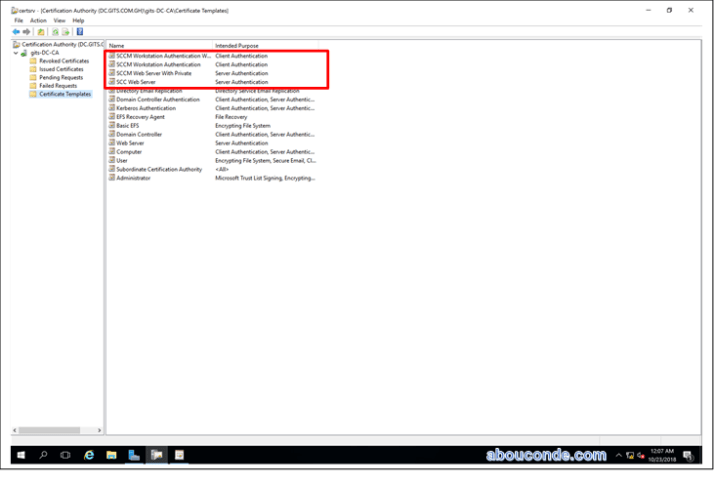
Select all four of the ConfigMgr templates you created then click OK.

They will then show up in the Certificate Templates listing. Once you verify that, you can close the Certification Authority console.
Run the mmc.exe command.

In the empty console, click File, and then click Add/Remove Snap-in.In the Add or Remove Snap-ins dialog box, select Certificates from the list of Available snap-ins, and then click Add

In the Certificate snap-in dialog box, select Computer account, and then click Next.

In the Select Computer dialog box, ensure Local computer: (the computer this console is running on) is selected, and then click Finish.
 In the Add or Remove Snap-ins dialog box, click OK. In the console, expand Certificates (Local Computer), and then click Personal. Right-click Certificates, click All Tasks, and then click Request New Certificate.

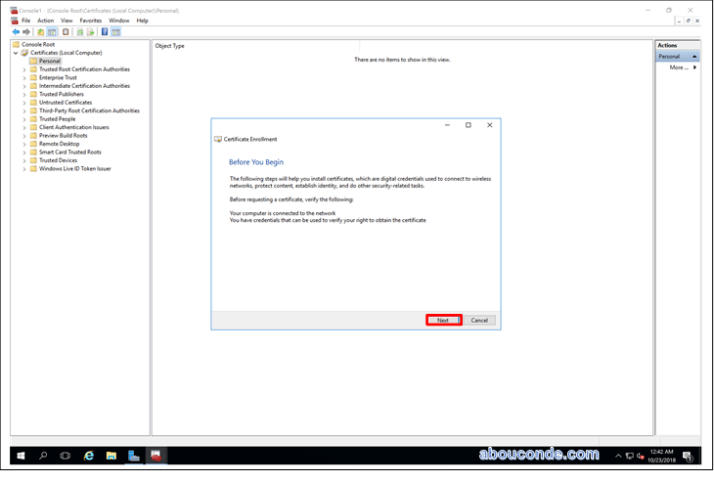
Right-click in a blank space and click All Tasks > Request New Certificate, You are presented with the Certificate Enrollment wizard. Click Next
On Select Certificate Enrollment Policy page, click Next.

On the Request Certificates page, identify the SCCM Web Server Certificate from the list of displayed certificates, and then click

On the Certificates Installation Results page, wait until the certificate is installed (the status should show Succeeded), and then click Finish.


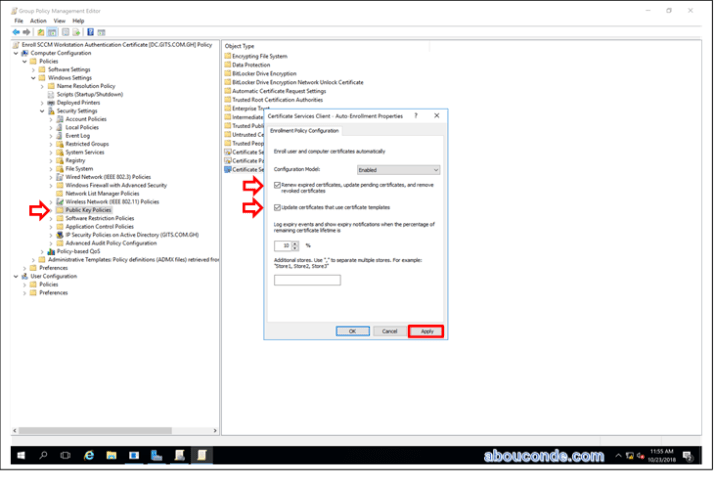
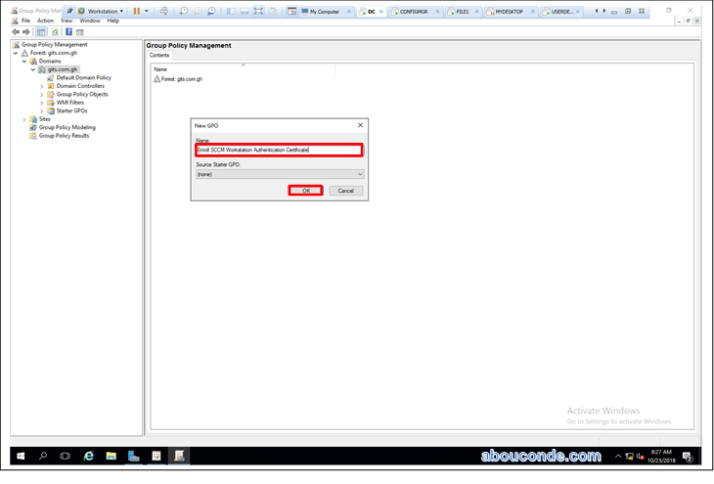
On the domain controller, launch the Group Policy Management.

Navigate to your domain,

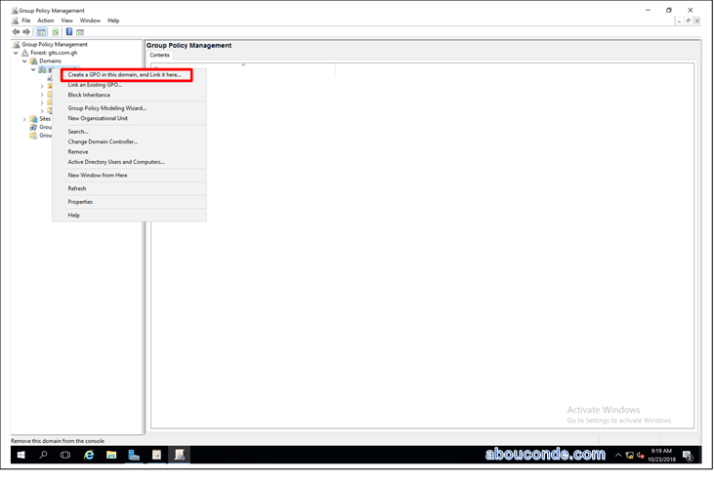
Right-click the domain, and then select Create a GPO in this domain, and Link it here.
In the New GPO dialog box, enter a name for the new Group Policy, and click OK
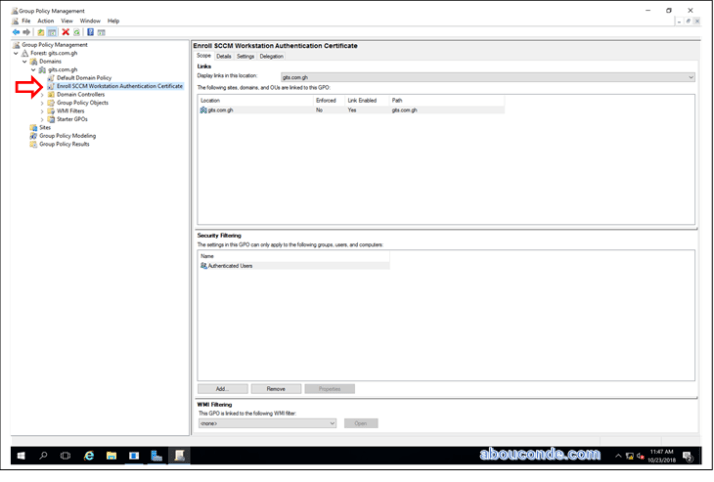
In the results pane, on the Linked Group Policy Objects tab, right-click the new Group Policy, and then click Edit.

In the Group Policy Management Editor, expand Policies under Computer Configuration, and then navigate to Windows Settings > Security Settings > Public Key Policies.

Right-click the object type named Certificate Services Client – Auto-enrollment, and then click Properties. From the Configuration Model drop-down list, select Enabled, select Renew expired certificates, update pending certificates, and remove revoked certificates, select Update certificates that use certificate templates, and then click OK. Close the GPMC.