
Azure Private DNS Overview
Azure Private DNS provides a reliable, secure DNS service to manage and resolve domain names in a virtual network without the need to add a custom DNS solution. By using private DNS zones, you can use your own custom domain names rather than the Azure-provided names available today. Using custom domain names helps you to tailor your virtual network architecture to best suit your organization’s needs. It provides name resolution for virtual machines (VMs) within a virtual network and between virtual networks. Additionally, you can configure zones names with a split-horizon view, which allows a private and a public DNS zone to share the name.
This blog post shows how to Configuring Azure DNS private zone using Azure PowerShell Core
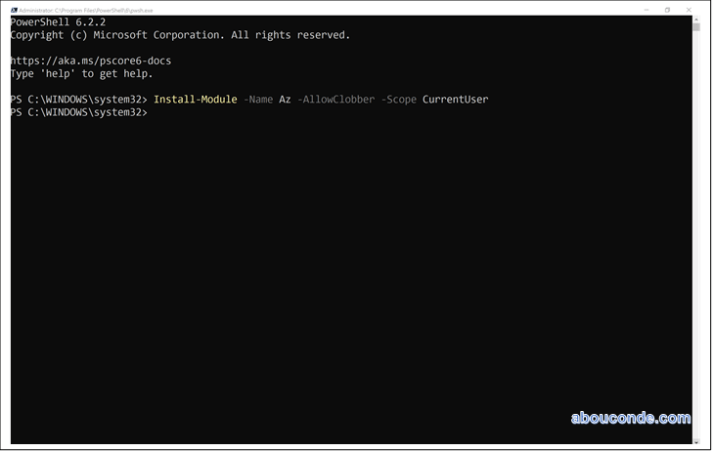
Install or Update Az PowerShell Module
Starting in December 2018, the Azure PowerShell Az module is in general release and now the intended PowerShell module for interacting with Azure. Az offers shorter commands, improved stability, and cross-platform support. Az also has feature parity with AzureRM, giving you an easy migration path.
The recommended install method is to only install for the active user:
Install-Module -Name Az -AllowClobber -Scope CurrentUser
If you want to install for all users on a system, this requires administrator privileges. From an elevated PowerShell session either run as administrator or with the sudo command on macOS or Linux:
Install-Module -Name Az -AllowClobber -Scope AllUsers

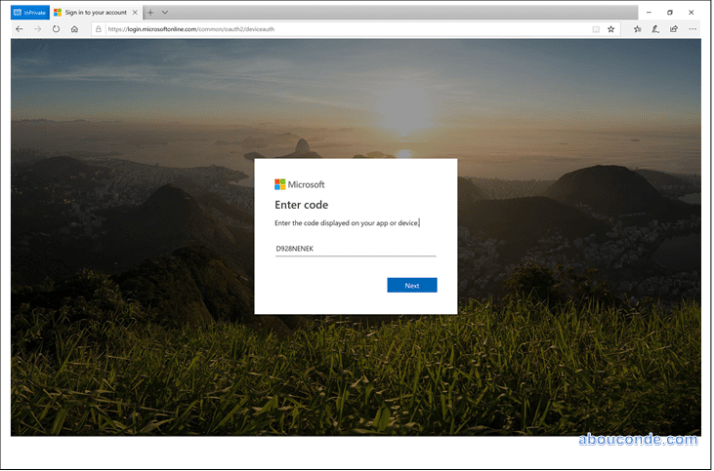
Sign in
To start working with Azure PowerShell, sign in with your Azure credentials.
Connect-AzAccount
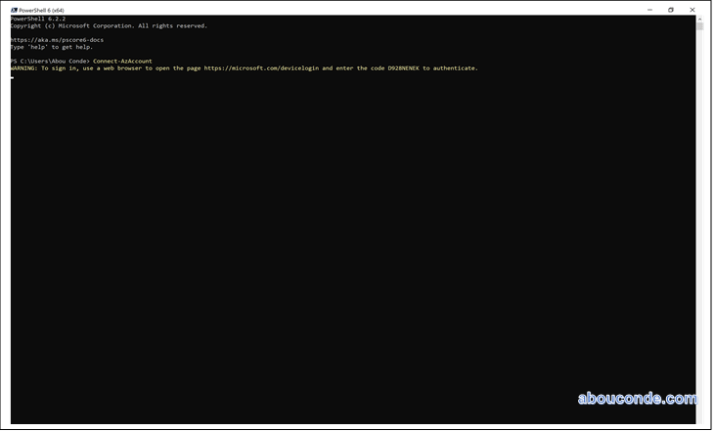
Connect to Azure with a browser sign in token
https://microsoft.com/devicelogin
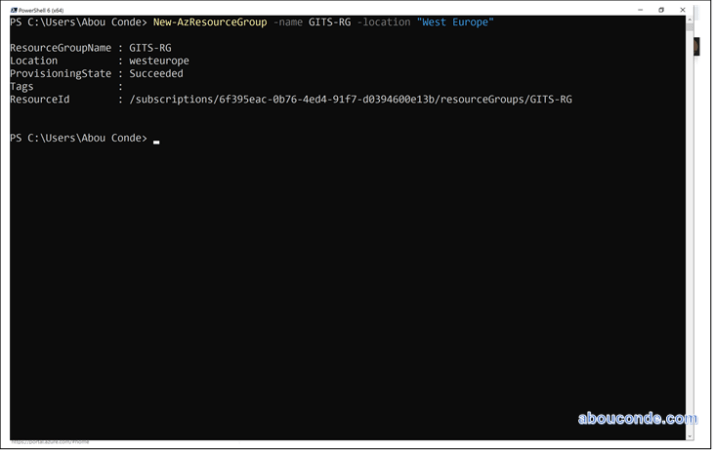
Create the resource group
Create a resource group to contain the DNS zone
New-AzResourceGroup -name GITS-RG -location “West Europe”
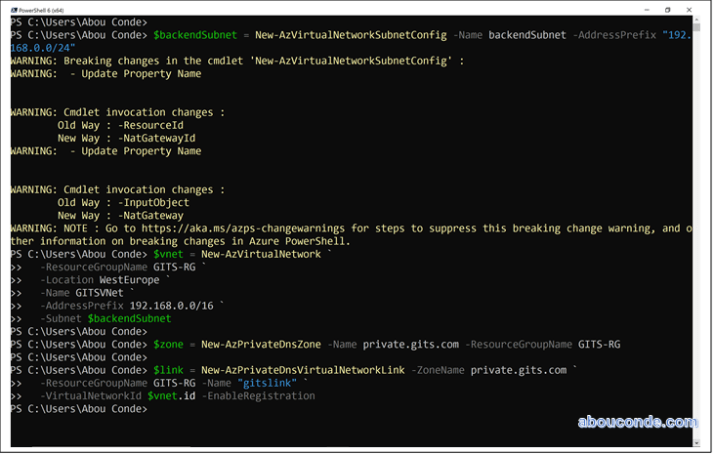
Create a DNS private zone
The following example creates a virtual network named GITSVNet. Then it creates a DNS zone named private.gits.com in the
GITS-RG resource group, links the DNS zone to the GITSVnet virtual network, and enables automatic registration.
Install-Module -Name Az.PrivateDns -force
$backendSubnet = New-AzVirtualNetworkSubnetConfig -Name backendSubnet -AddressPrefix “192.168.0.0/24”
$vnet = New-AzVirtualNetwork `
-ResourceGroupName GITS-RG `
-Location WestEurope `
-Name GITSVNet `
-AddressPrefix 192.168.0.0/16 `
-Subnet $backendSubnet
$zone = New-AzPrivateDnsZone -Name private.gits.com -ResourceGroupName GITS-RG
$link = New-AzPrivateDnsVirtualNetworkLink -ZoneName private.gits.com `
-ResourceGroupName GITS-RG -Name “gitslink” `
-VirtualNetworkId $vnet.id -EnableRegistration
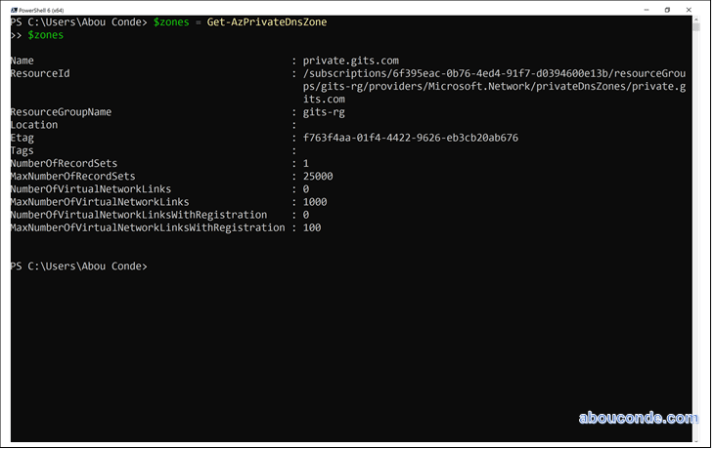
List DNS private zones
$zones = Get-AzPrivateDnsZone
$zones
Create the test virtual machines
Now, create two virtual machines so you can test your private DNS zone:
New-AzVm `
-ResourceGroupName “GITS-RG” `
-Name “Host1” `
-Location “West Europe” `
-subnetname backendSubnet `
-VirtualNetworkName “GITSVnet” `
-addressprefix 192.168.0.0/24 `
-OpenPorts 3389
New-AzVm `
-ResourceGroupName “GITS-RG” `
-Name “Host2” `
-Location “West Europe” `
-subnetname backendSubnet `
-VirtualNetworkName “GITSVnet” `
-addressprefix 192.168.0.0/24 `
-OpenPorts 3389
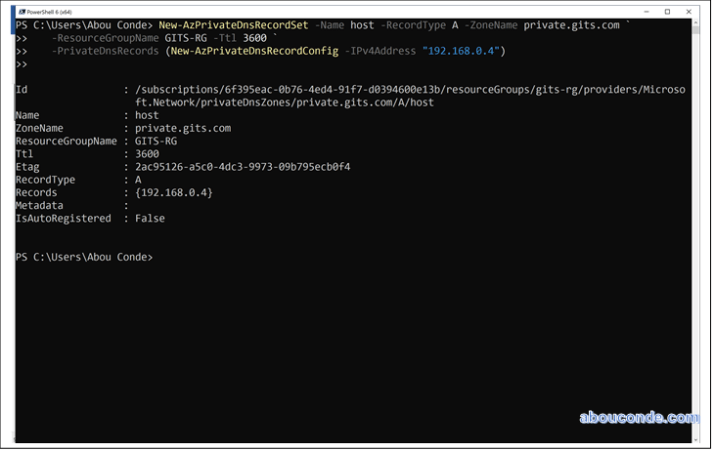
Create an additional DNS record
The following example creates a record with the relative name host in the DNS Zone private.gits.com, in resource group GITS-RG. The fully qualified name of the record set is host.private.gits.com. The record type is “A”, with IP address “192.168.0.4”, and the TTL is 3600 seconds.
New-AzPrivateDnsRecordSet -Name host -RecordType A -ZoneName private.gits.com `
-ResourceGroupName GITS-RG -Ttl 3600 `
-PrivateDnsRecords (New-AzPrivateDnsRecordConfig -IPv4Address “192.168.0.4”)
View DNS records
To list the DNS records in your zone, run:
Get-AzPrivateDnsRecordSet -ZoneName private.gits.com -ResourceGroupName GITS-RG

Test the private zone
Now you can test the name resolution for your private.gits.com private zone.
Configure VMs to allow inbound ICMP
You can use the ping command to test name resolution. So, configure the firewall on both virtual machines to allow inbound ICMP packets.
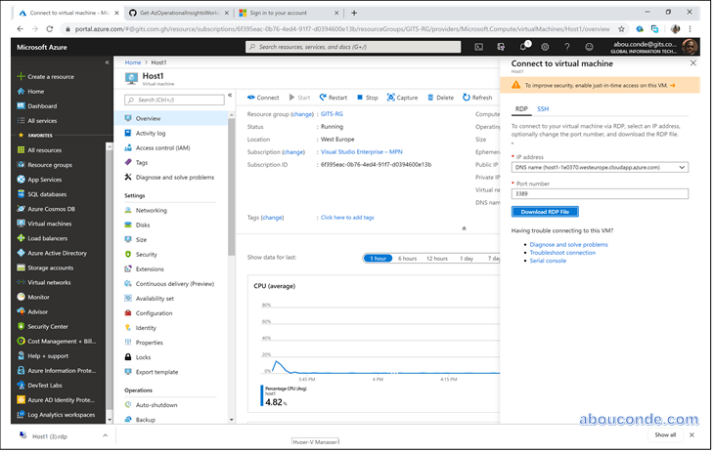
Connect to Host1, and open a Windows PowerShell window with administrator privileges.
Run the following command:
New-NetFirewallRule –DisplayName “Allow ICMPv4-In” –Protocol ICMPv4
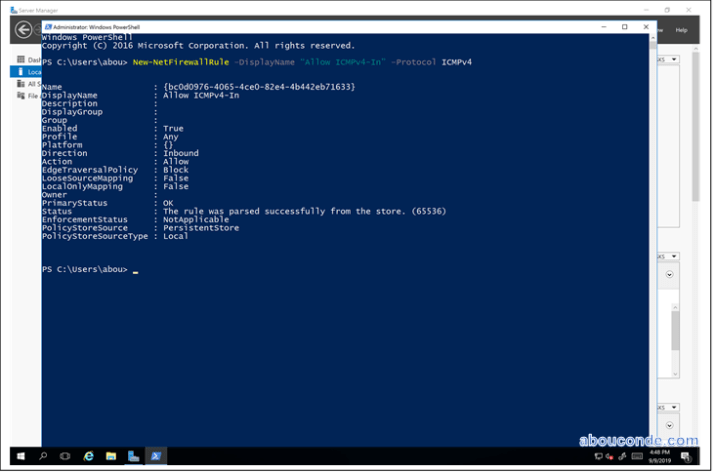
Repeat for Host2.
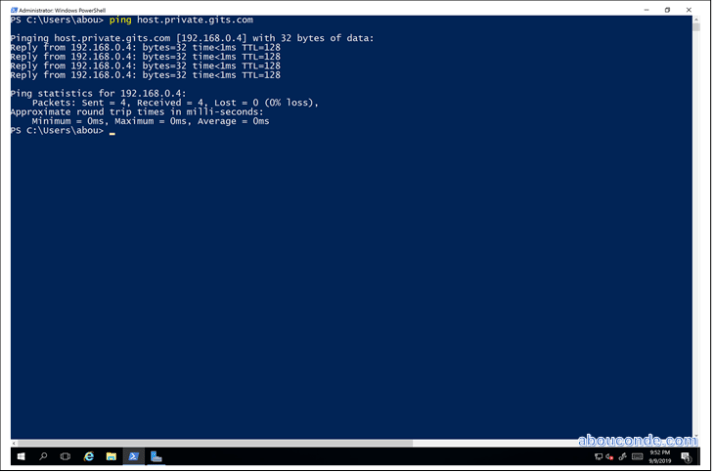
Ping the VMs by name
From the Host2 Windows PowerShell command prompt, ping Host1 using the automatically registered host name:
ping Host1.private.gits.com

Now ping the Host name you created previously:
ping host.private.gits.com
Delete all resources
When no longer needed, delete the GITS-RG resource group to delete the resources created in this article.
Remove-AzResourceGroup -Name GITS-RG
