
Create a project to establish a repository for source code, where a group of developers and teams can plan, track progress, and collaborate on building software solutions. Each project you create provides boundaries to isolate data from other projects and must be managed and structured to support your business needs.
This blog post shows, how to create a project in Azure DevOps or a Team Foundation Server.
Create a project from the web portal
To create a project, you must first have created an organization in Azure DevOps.
Sign up for Azure DevOps with a personal Microsoft account
Select the sign-up link for Azure DevOps. Enter your email address, phone number, or Skype ID for your Microsoft account. If you’re a Visual Studio subscriber and you get Azure DevOps as a benefit, use the Microsoft account associated with your subscription. Select Next.
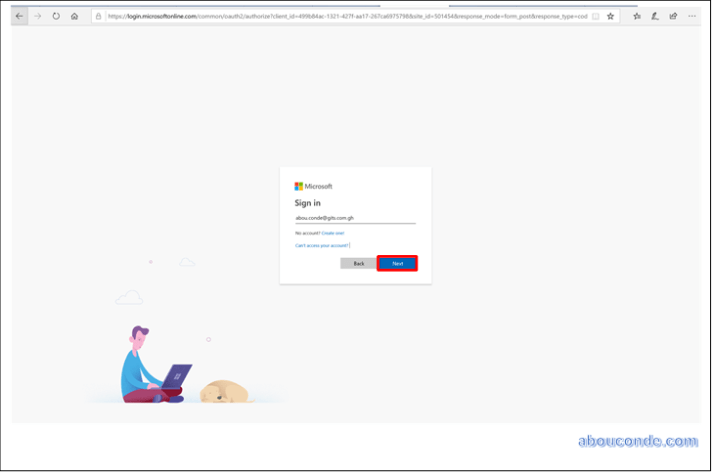
Enter your password and select Sign in.

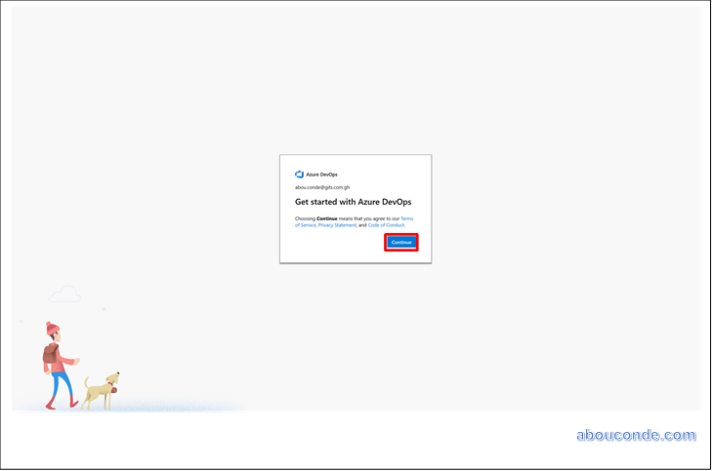
To get started with Azure DevOps, select Continue.
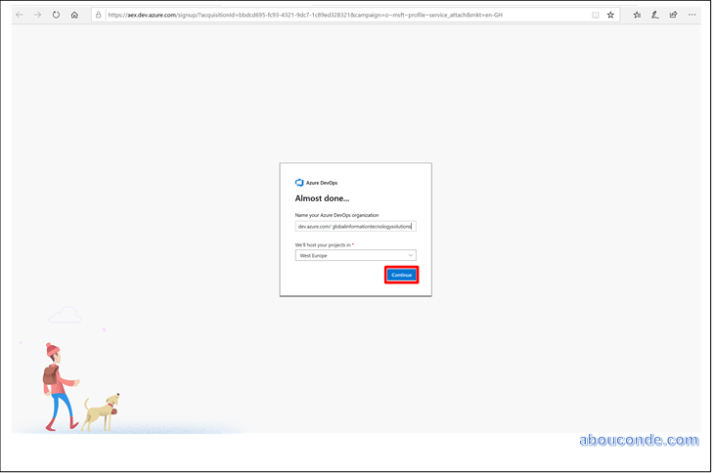
Enter a name for your organization. The name can’t contain spaces or special characters (such as / \ [ ] : | < > + = ; ? or *), can’t end in a period or comma, must be less than 256 characters, and must be unique within the DevOps namespace. You can also choose between several locations for where you want your data hosted. Select Continue.
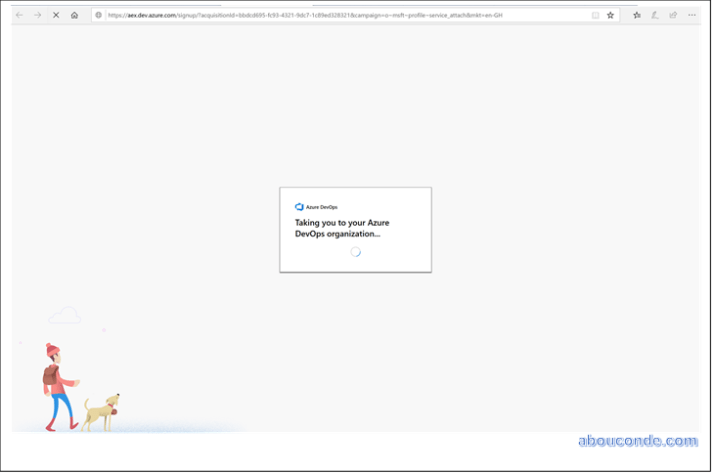
You see the following dialog box as your organization is created.
Congratulations, you’re now an organization owner!
To sign in to your organization at any time, go to
https://dev.azure.com/{yourorganization}.
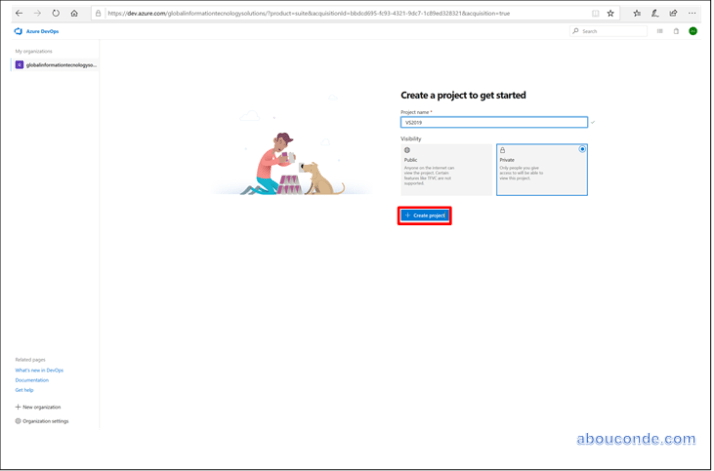
Enter a name for your project and select the visibility. The name can’t contain special characters (such as / : \ ~ & % ; @ ‘ ” ? < > | # $ * } { , + = [ ]), can’t begin with an underscore, can’t begin or end with a period, and must be 64 characters or less. Visibility can be either public or private. With public visibility, anyone on the internet can view your project. With private visibility, only people who you give access to can view your project. Select Create project.
Welcome to your project
When your project has been created, the welcome page appears.


Thanks for the walkthrough. It was very helpful.
LikeLike