The Azure command-line interface (CLI) is Microsoft’s cross-platform command-line experience for managing Azure resources. Use it in your browser with Azure Cloud Shell, or install it on macOS, Linux, or Windows and run it from the command line.
The Azure CLI is easy to get started with, and best used for building automation scripts that work with the Azure Resource Manager.
This blog post shows how to create storage account using the Azure CLI.
Interactive login: az login –use-device-code

Go to https://microsoft.com/devicelogin and enter code

Sign in with your account credentials in the browser.

After logging in, you see a list of subscriptions associated with your Azure account. The subscription information with isDefault: true
is the currently activated subscription after logging in.

List supported regions for the current subscription.
az account list-locations –query [*].[displayName,name] –out table

Create a new resource group in the West Europe region.
az group create -l WestEurope -n GITS-Sorage-RG

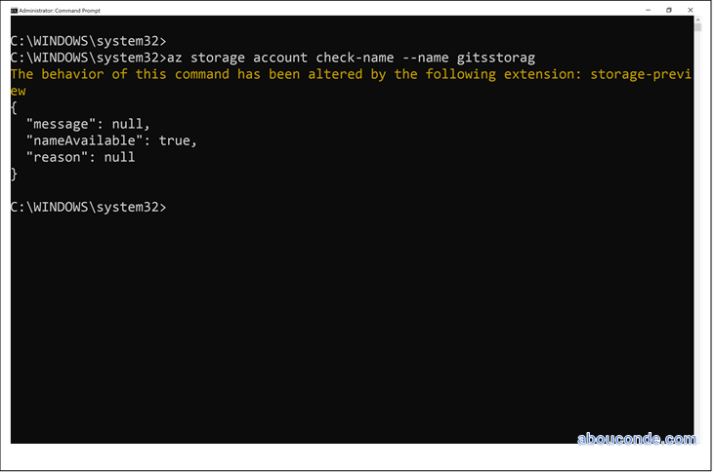
Checks that the storage account name is valid and is not already in use.
az storage account check-name –name gitsstorage
Create a storage account.
az storage account create –name gitsstorage –resource-group GITS-Sorage-RG –location WestEurope –sku Standard_LRS –kind StorageV2

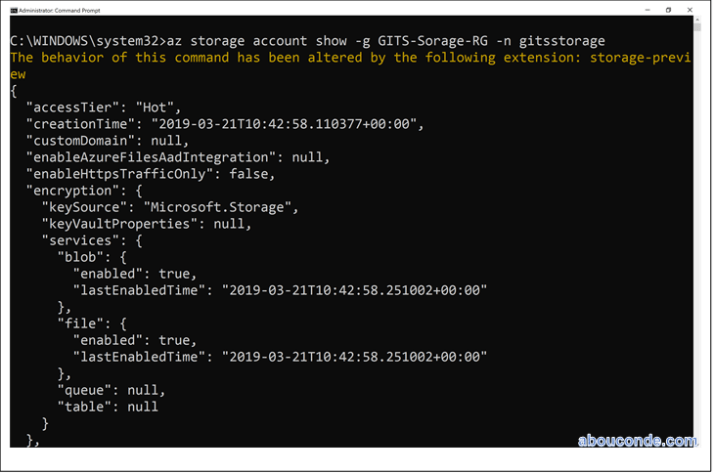
Show storage account properties.
az storage account show -g GITS-Sorage-RG -n gitsstorage
List storage accounts.
az storage account list -g GITS-Sorage-RG –query [*].{Name:name,Location:primaryLocation,Sku:sku.name,Kind:kind} –out table

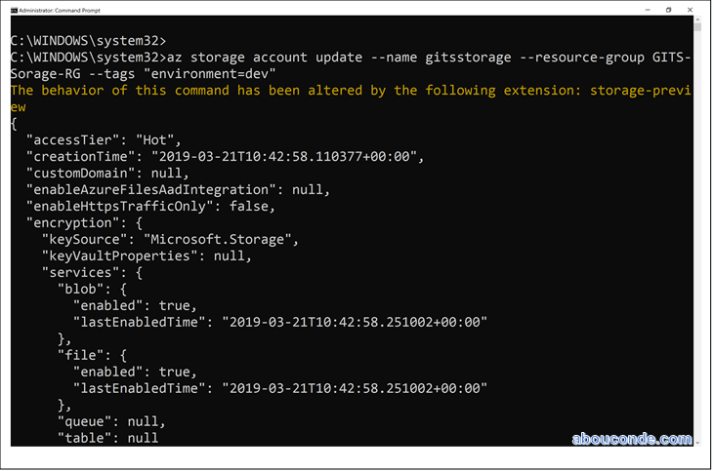
Update the properties of a storage account. Add tags
az storage account update –name gitsstorage –resource-group GITS-Sorage-RG –tags “environment=dev”
List storage accounts.
az storage account list -g GITS-Sorage-RG –query [*].{Name:name,Location:primaryLocation,Sku:sku.name,Kind:kind,Tags:tags.environment} –out table

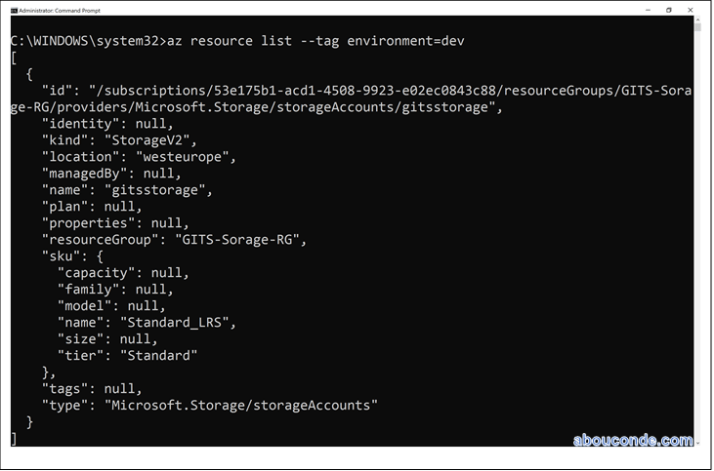
az resource list –tag environment=dev

It’s onerous to seek out knowledgeable people on this topic, however you sound like you realize what you’re talking about! Thanks
LikeLike