This blog post shows how to prepare your environment to back up workloads using Microsoft Azure Backup Server (MABS). With Azure Backup Server, you can protect application workloads such as Hyper-V VMs, Microsoft SQL Server, SharePoint Server, Microsoft Exchange, and Windows clients from a single console.
MABS deployed in an Azure VM can backup VM’s in Azure but they should be in same domain to enable backup operation. The process to back an Azure VM remains same as backing up VMs on premises, however deploying MABS in Azure has some limitations.
Azure Backup Server inherits much of the workload backup functionality from Data Protection Manager (DPM). Though Azure Backup Server shares much of the same functionality as DPM, Azure Backup Server does not back up to tape, nor does it integrate with System Center.
Choose an installation platform
The first step towards getting the Azure Backup Server up and running is to set up a Windows Server.
Your server can be in Azure or on-premises.
Using a server in Azure
When choosing a server for running Azure Backup Server, it is recommended you start with a gallery image of Windows Server 2012 R2 Datacenter, Windows Server 2016 Datacenter or Windows Server 2019 Datacenter. The recommended minimum requirements for the server virtual machine (VM) should be: A2 Standard with two cores and 3.5 GB RAM.
Using an on-premises server
If you do not want to run the base server in Azure, you can run the server on a Hyper-V VM, a VMware VM, or a physical host. The recommended minimum requirements for the server hardware are two cores and 4 GB RAM. The supported operating systems are listed in the following table:
| Operating System | Platform | SKU |
| Windows Server 2019 | 64 bit | Standard, Datacenter, Essentials (MABS V3 and later) |
| Windows Server 2016 and latest SPs | 64 bit | Standard, Datacenter, Essentials (MABS V2 and later) |
| Windows Server 2012 R2 and latest SPs | 64 bit | Standard, Datacenter, Foundation |
| Windows Server 2012 and latest SPs | 64 bit | Datacenter, Foundation, Standard |
| Windows Storage Server 2012 R2 and latest SPs | 64 bit | Standard, Workgroup |
| Windows Storage Server 2012 and latest SPs | 64 bit | Standard, Workgroup |
You can deduplicate the DPM storage using Windows Server Deduplication.
Note
Azure Backup Server is designed to run on a dedicated, single-purpose server. You cannot install Azure Backup Server on:
- A computer running as a domain controller
- A computer on which the Application Server role is installed
- A computer that is a System Center Operations Manager management server
- A computer on which Exchange Server is running
- A computer that is a node of a cluster
Always join Azure Backup Server to a domain. If you plan to move the server to a different domain, install Azure Backup Server first, then join the server to the new domain. Moving an existing Azure Backup Server machine to a new domain after deployment is not supported.
Whether you send backup data to Azure, or keep it locally, Azure Backup Server must be registered with a Recovery Services vault.
Create a Recovery Services vault
A Recovery Services vault is an entity that stores the backups and recovery points created over time. The Recovery Services vault also contains the backup policies that are associated with the protected virtual machines.
To create a Recovery Services vault:
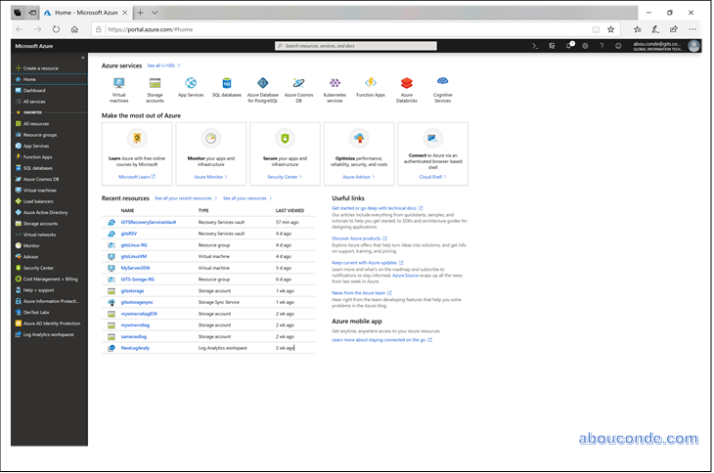
Sign in to your subscription in the Azure portal.
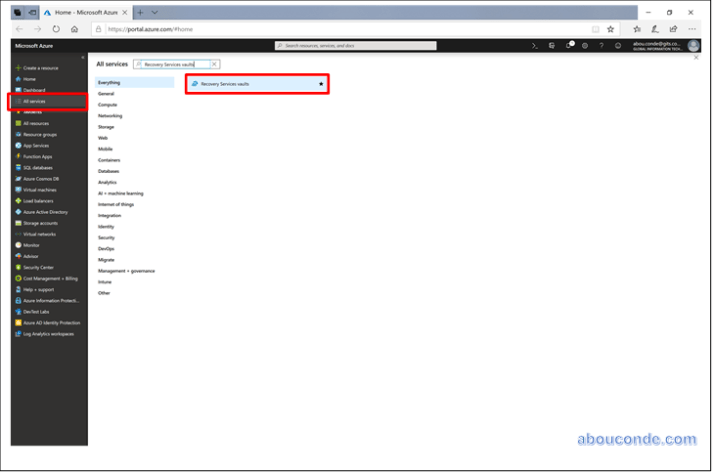
In the All services dialog box, enter Recovery Services. The list of resources filters according to your input. In the list of resources, select Recovery Services vaults.
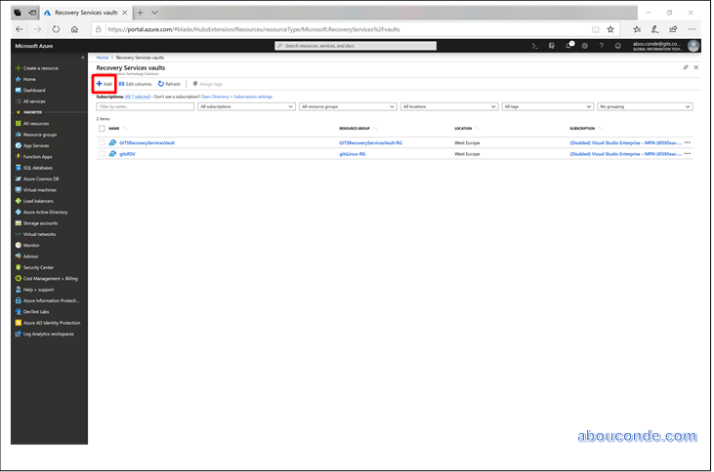
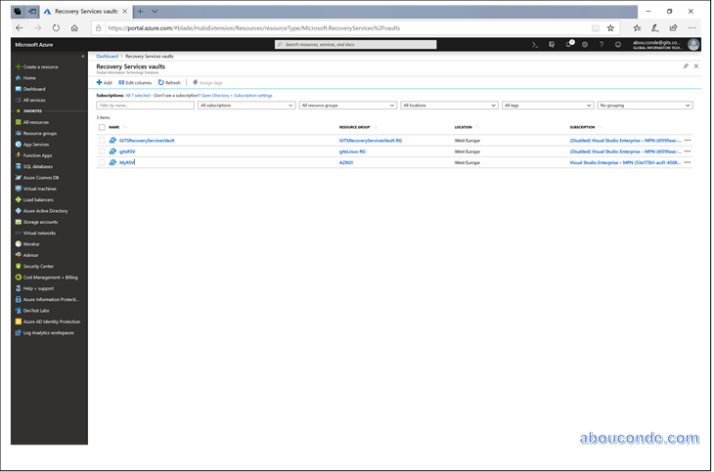
The list of Recovery Services vaults in the subscription appears.
On the Recovery Services vaults dashboard, select Add.
The Recovery Services vault dialog box opens. Provide values for the Name, Subscription, Resource group, and Location.
When you’re ready to create the Recovery Services vault, select Create.

It can take a while to create the Recovery Services vault. Monitor the status notifications in the Notifications area at the upper-right corner of the portal. After your vault is created, it’s visible in the list of Recovery Services vaults. If you don’t see your vault, select Refresh.
Software package
Downloading the software package
From the list of Recovery Services vaults, select a vault.
The selected vault dashboard opens.
Click Backup to open the Getting Started wizard.

In the Backup Goal blade, from the Where is your workload running menu, select On-premises.
From the What do you want to backup? drop-down menu, select the workloads you want to protect using Azure Backup Server, and then click OK.

The Getting Started with backup wizard switches the Prepare infrastructure option to back up workloads to Azure.
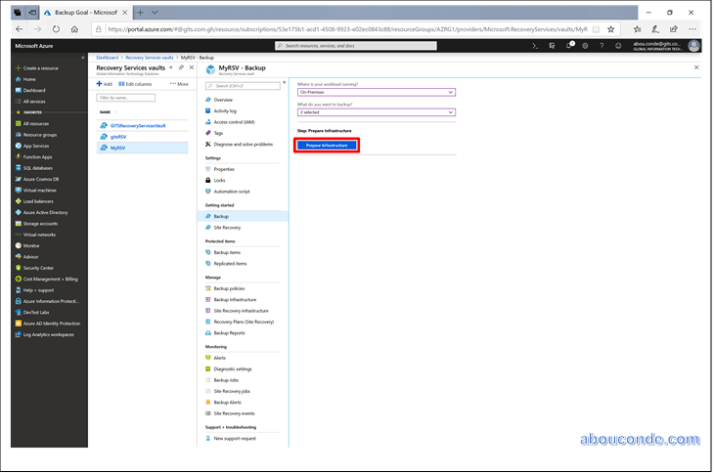
In the Prepare infrastructure blade that opens, click the Download links for Install Azure Backup Server and Download vault credentials. You use the vault credentials during registration of Azure Backup Server to the recovery services vault. The links take you to the Download Center where the software package can be downloaded.

Select all the files and click Next. Download all the files coming in from the Microsoft Azure Backup download page, and place all the files in the same folder.

Since the download size of all the files together is > 3G, on a 10Mbps download link it may take up to 60 minutes for the download to complete.

Extracting the software package
After you’ve downloaded all the files, click MicrosoftAzureBackupInstaller.exe. This will start the Microsoft Azure Backup Setup Wizard to extract the setup files to a location specified by you. Continue through the wizard and click on the Extract button to begin the extraction process.

Installing the software package
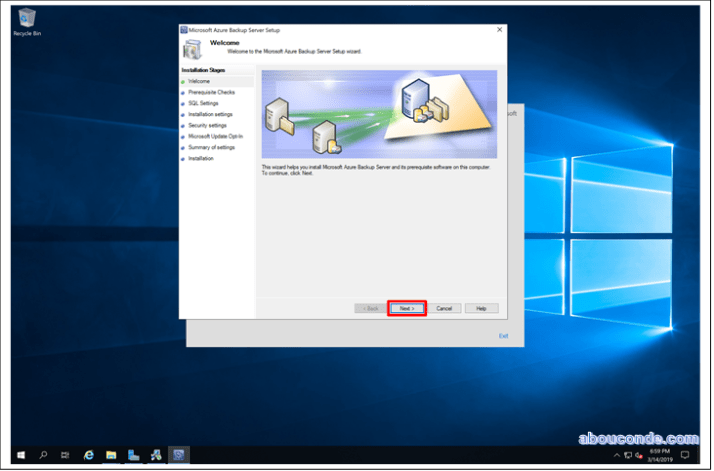
Click Microsoft Azure Backup to launch the setup wizard.

On the Welcome screen click the Next button. This takes you to the Prerequisite Checks section.
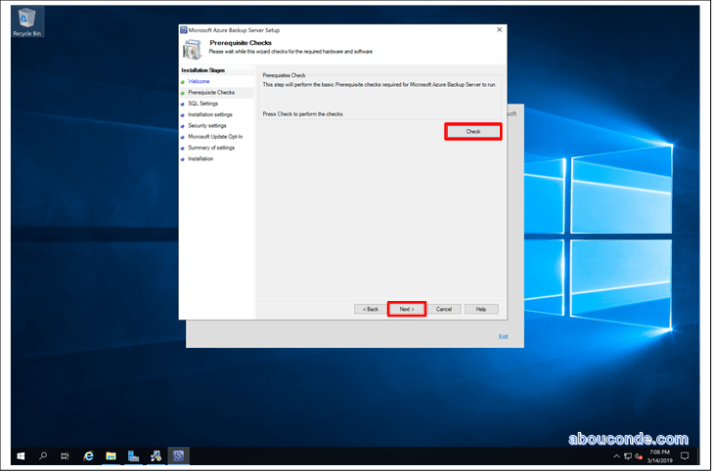
On this screen, click Check to determine if the hardware and software prerequisites for Azure Backup Server have been met. If all prerequisites are met successfully, you will see a message indicating that the machine meets the requirements. Click on the Next button.
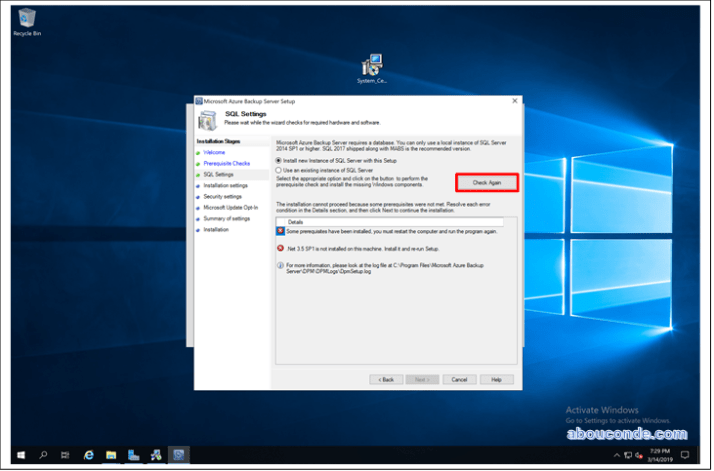
Microsoft Azure Backup Server requires SQL Server Enterprise. Further, the Azure Backup Server installation package comes bundled with the appropriate SQL Server binaries needed if you do not wish to use your own SQL. When starting with a new Azure Backup Server installation, you should pick the option Install new Instance of SQL Server with this Setup and click the Check and Install button. Once the prerequisites are successfully installed, click Next.

If a failure occurs with a recommendation to restart the machine, do so and click Check Again. In case of any SQL configuration issues, reconfigure SQL as per the SQL guidelines and retry to install/upgrade MABS using the existing instance of SQL.
Provide a location for the installation of Microsoft Azure Backup server files and click Next.
The scratch location is a requirement for back up to Azure. Ensure the scratch location is at least 5% of the data planned to be backed up to the cloud. For disk protection, separate disks need to be configured once the installation completes.

Provide a strong password for restricted local user accounts and click Next.

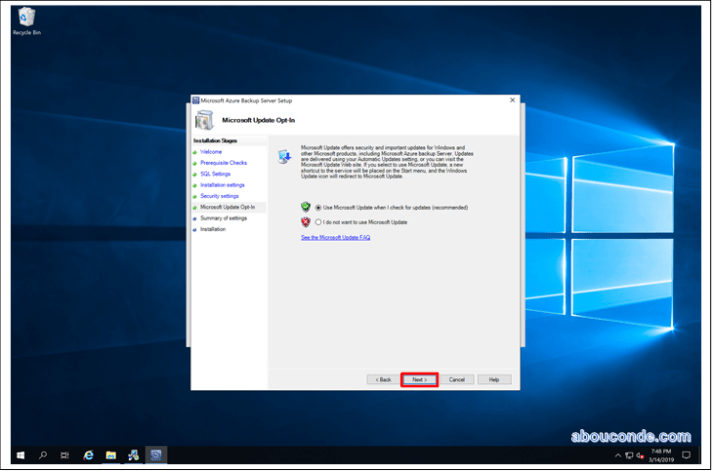
Select whether you want to use Microsoft Update to check for updates and click Next.
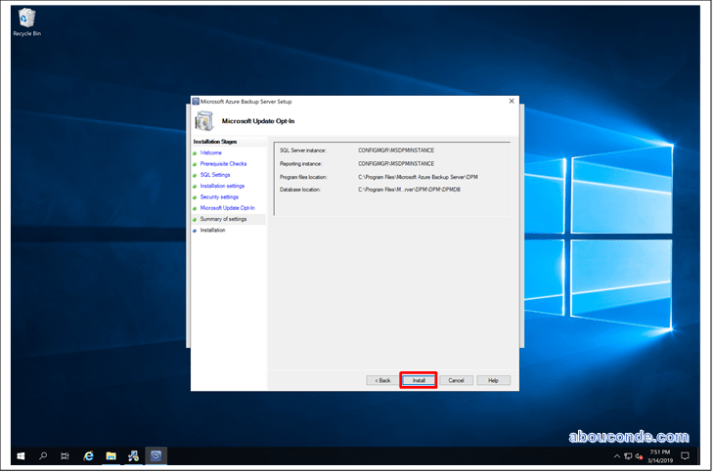
Review the Summary of Settings and click Install.
The installation happens in phases. In the first phase the Microsoft Azure Recovery Services Agent is installed on the server. The wizard also checks for Internet connectivity. If Internet connectivity is available you can proceed with installation, if not, you need to provide proxy details to connect to the Internet.
The next step is to configure the Microsoft Azure Recovery Services Agent. As a part of the configuration, you will have to provide your vault credentials to register the machine to the recovery services vault. You will also provide a passphrase to encrypt/decrypt the data sent between Azure and your premises. You can automatically generate a passphrase or provide your own minimum 16-character passphrase. Continue with the wizard until the agent has been configured.

Once registration of the Microsoft Azure Backup server successfully completes, the overall setup wizard proceeds to the installation and configuration of SQL Server and the Azure Backup Server components. Once the SQL Server component installation completes, the Azure Backup Server components are installed.

When the installation step has completed, the product’s desktop icons will have been created as well. Just double-click the icon to launch the product.