
Azure Backup provides the capability to restore Azure virtual machines (VMs) and disks from Azure VM backups, also known as recovery points.
This blog post shows, how to recover files and folders from an Azure VM backup. Restoring files and folders is available only for Azure VMs deployed using the Resource Manager model and protected to a Recovery services vault.
Mount the volume and copy files
To restore files or folders from the recovery point, go to the virtual machine and choose the desired recovery point.
Sign in to the Azure portal and in the left pane, click Virtual machines. From the list of virtual machines, select the virtual machine to open that virtual machine’s dashboard.

In the virtual machine’s menu, click Backup to open the Backup dashboard.

In the Backup dashboard menu, click File Recovery.
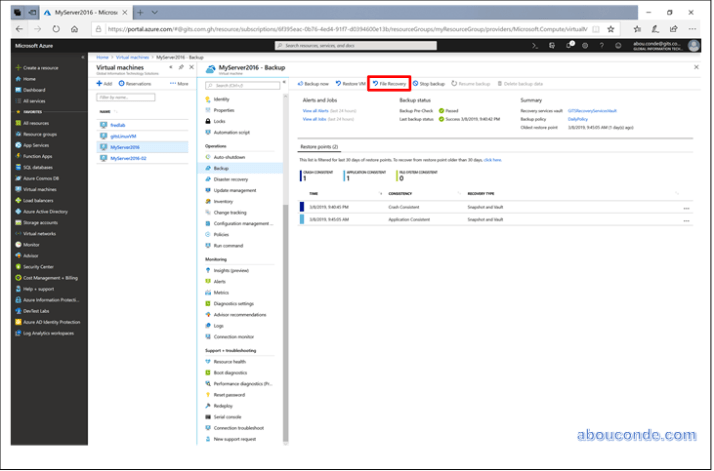
The File Recovery menu opens
From the Select recovery point drop-down menu, select the recovery point that holds the files you want. By default, the latest recovery point is already selected.

To download the software used to copy files from the recovery point, click Download Executable (for Windows Azure VM) or Download Script (for Linux Azure VM, a python script is generated).
Azure downloads the executable or script to the local computer.
To run the executable or script as an administrator, it is suggested you save the download to your computer.
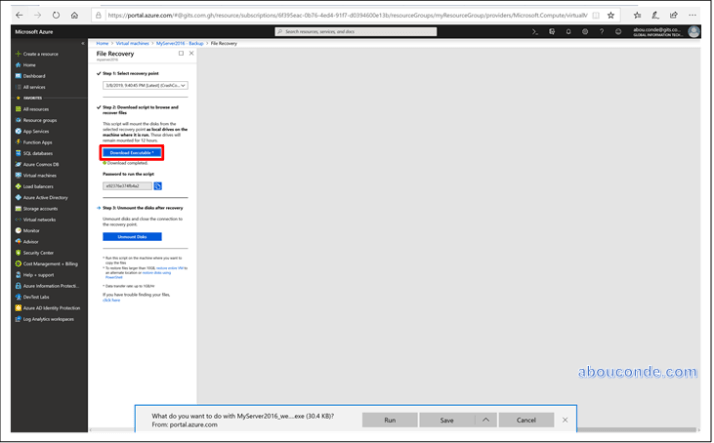
The executable or script is password protected and requires a password. In the File Recovery menu, click the copy button to load the password into memory.

From the download location (usually the Downloads folder), right-click the executable or script and run it with Administrator credentials. When prompted, type the password or paste the password from memory, and press Enter. Once the valid password is entered, the script connects to the recovery point.

Closing the connection
After identifying the files and copying them to a local storage location, remove (or unmount) the additional drives. To unmount the drives, on the File Recovery menu in the Azure portal, click Unmount Disks.

