
Azure Search is a standalone resource used to plug in a search experience in custom apps. Although Azure Search integrates easily with other Azure services, you can also use it by itself, with apps on network servers, or with software running on other cloud platforms.
This blog post shows how to use Azure Search to index documents (such as PDFs, Microsoft Office documents, and several other common formats) stored in Azure Blob storage.
First, it explains the basics of setting up and configuring a blob indexer. Then, it offers a deeper exploration of behaviors and scenarios you are likely to encounter.
Supported document formats
The blob indexer can extract text from the following document formats:
- Microsoft Office formats: DOCX/DOC, XLSX/XLS, PPTX/PPT, MSG (Outlook emails)
- HTML
- XML
- ZIP
- EML
- RTF
- Plain text files
- JSON
- CSV
Create an Azure Search service
Sign in to the Azure portal at https://portal.azure.com.
In the list of Storage Accounts, select the desired storage account.
Under Settings, select Add Azure Search.

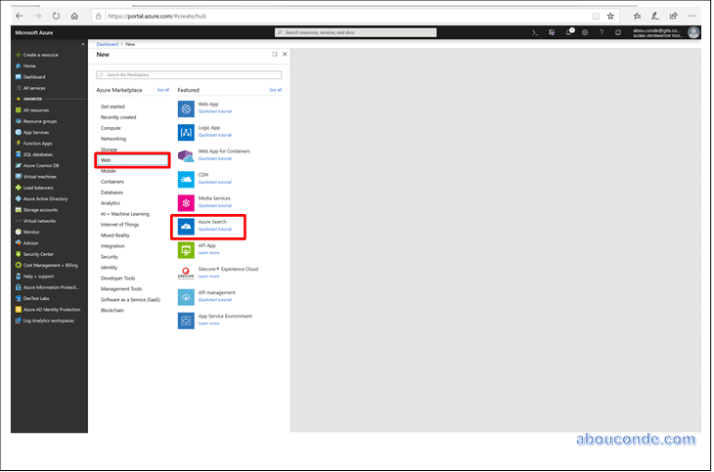
Use the search bar to find “Azure Search” or navigate to the resource through Web > Azure Search.
C
Name the service and URL endpoint
A service name is part of the URL endpoint against which API calls are issued: https://your-service-name.search.windows.net
Enter your service name in the URL field.
Service name requirements:
- It must be unique within the search.windows.net namespace
- 2 and 60 characters in length
- Use lowercase letters, digits, or dashes (“-“)
- Avoid dashes (“-“) in the first 2 characters or as the last single character
-
No consecutive dashes (“–“) anywhere
Select a subscription
If you have more than one subscription, choose one that also has data or file storage services. Azure Search can autodetect Azure Table and Blob storage, SQL Database, and Azure Cosmos DB for indexing via indexers, but only for services in the same subscription.
Select a resource group
A resource group is a collection of Azure services and resources used together. For example, if you are using Azure Search to index a SQL database, then both services should be part of the same resource group.
If you aren’t combining resources into a single group, or if existing resource groups are filled with resources used in unrelated solutions, create a new resource group just for your Azure Search resource.
Select a hosting location
As an Azure service, Azure Search can be hosted in datacenters around the world. Prices can differ by geography.
If you are planning to use cognitive search, choose a region with feature availability.
Select a pricing tier (SKU)
Azure Search is currently offered in multiple pricing tiers: Free, Basic, or Standard. Each tier has its own capacity and limits.
Standard is usually chosen for production workloads, but most customers start with the Free service.
A pricing tier cannot be changed once the service is created. If you need a higher or lower tier later, you have to re-create the service.
Select Create, to create your Search Service

Start importing data
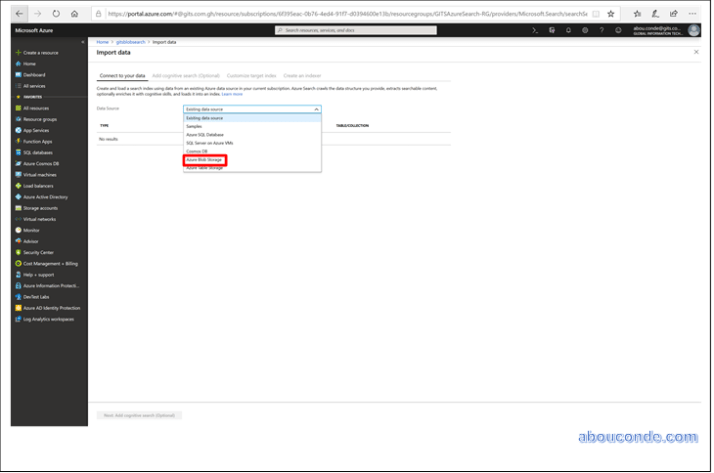
In the service overview page at the top, click Import data.

The wizard opens to Connect to your data, where you can choose an external data source to use for this import.
Select Azure Blob Storage
Next is Add cognitive search, in case you want to include optical character recognition (OCR) of text in image files, or text analysis over unstructured data. AI algorithms from Cognitive Services are pulled in for this task.

Next is Customize target index, where you can accept or modify the index schema presented in the wizard. The wizard infers the fields and datatypes by sampling data and reading metadata from the external data source.

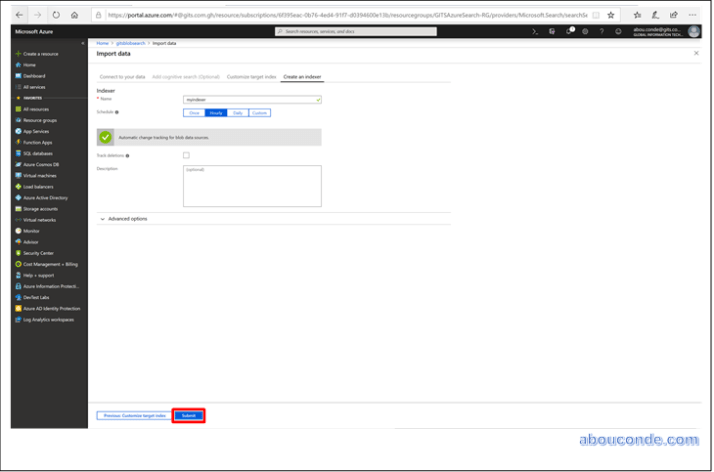
Next is Create an indexer, which is a product of this wizard. An indexer is a crawler that extracts searchable data and metadata from an external Azure data source. By selecting the data source and attaching skillsets (optional) and an index, you’ve been configuring an indexer as you move through each step of the wizard.

Give the indexer a name, and click Submit to begin the import process.
You can monitor indexing in the portal by clicking the indexer in the Indexers list. As documents are loaded, the document count will grow for the index you have defined. Sometimes it takes a few minutes for the portal page to pick up the most recent updates.

