Just as a blueprint allows an engineer or an architect to sketch a project’s design parameters, Azure Blueprints enables cloud architects and central information technology groups to define a repeatable set of Azure resources that implements and adheres to an organization’s standards, patterns, and requirements. Azure Blueprints makes it possible for development teams to rapidly build and stand up new environments with trust they’re building within organizational compliance with a set of built-in components — such as networking — to speed up development and delivery.
Blueprints are a declarative way to orchestrate the deployment of various resource templates and other artifacts such as:
- Role Assignments
- Policy Assignments
- Azure Resource Manager templates
- Resource Groups
The Azure Blueprints service is backed by the globally distributed Azure Cosmos DB. Blueprint objects are replicated to multiple Azure regions. This replication provides low latency, high availability, and consistent access to your blueprint objects, regardless of which region Blueprints deploys your resources to.
This blog post shows how to use Azure Blueprints to do some of the common tasks related to creating, publishing, and assigning a blueprint within your organization.
Create a blueprint
Sign in to the Azure portal at https://portal.azure.com with your Azure account.
On the left pane of the Home, click All services
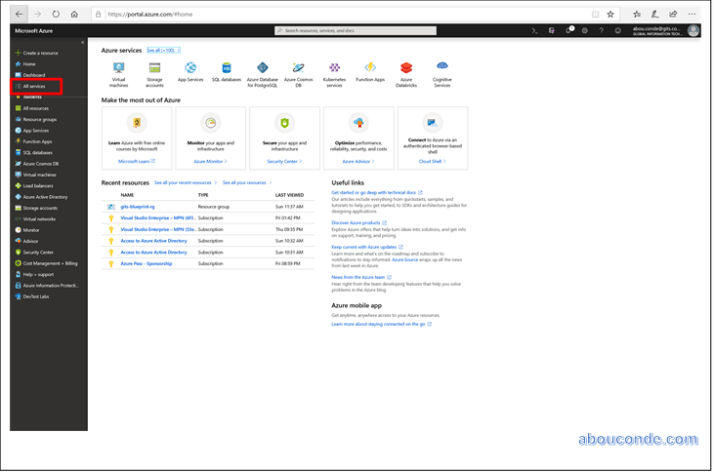
Click on Blueprints under MANAGEMENT + GOVERNANCE

Click on Create from the Getting started page to go straight to creating a blueprint.

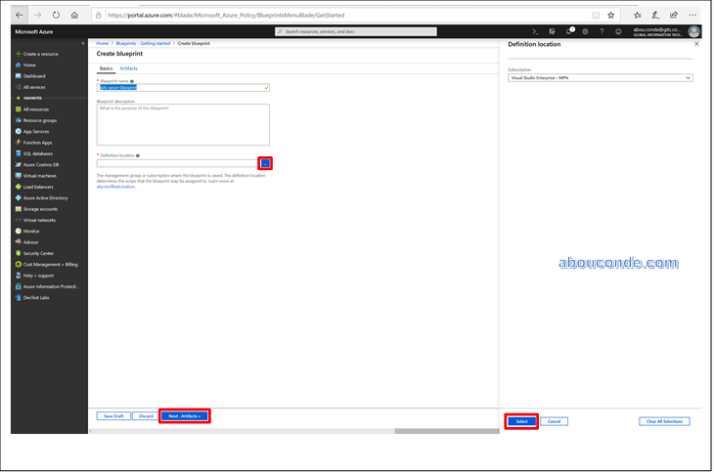
Provide a Blueprint Name such as ‘gits-azure-blueprint’ but leave Blueprint Description blank for now.
In the Definition Location box, click the ellipsis on the right, select the subscription where you want to save the blueprint and click Select.
Verify the information is correct (the Blueprint Name and Definition Location fields can’t be changed later) and click Next: Artifacts at the bottom of the page.
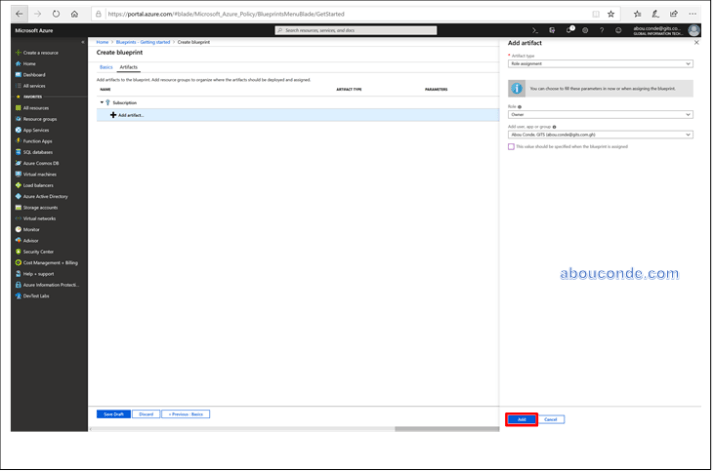
Add role assignment at subscription: Click on the + Add artifact… row under Subscription and the ‘Add artifact’ window opens on the right side of the browser. Select ‘Role Assignment’ for Artifact type.
Under Role, select ‘Owner’ and leave the Add User, App or Group field with the checkbox indicating a dynamic parameter.
Click Add to add this artifact to the blueprint.
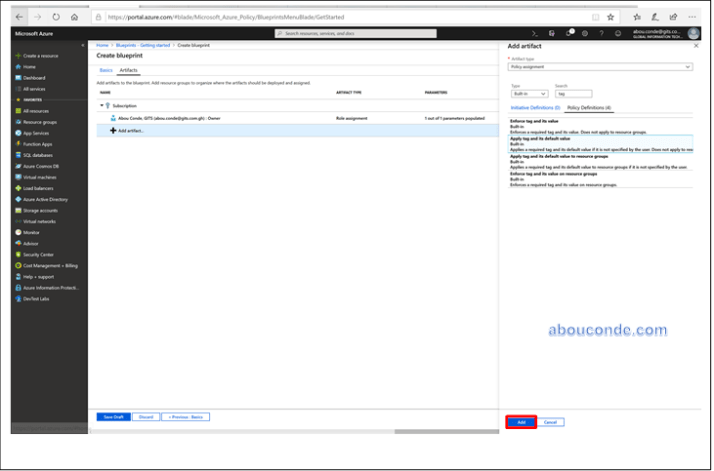
Add policy assignment at subscription: Click on the + Add artifact… row directly under the Subscription. Select ‘Policy Assignment’ for Artifact type. Change Type to ‘Built-in’ and in Search enter ‘tag’. Click out of Search for the filtering to occur. Select ‘Apply tag and its default value to resource groups’ by clicking on it. Click Add to add this artifact to the blueprint.
Click on the row of policy assignment ‘Apply tag and its default value to resource groups’. The window to provide parameters to the artifact as part of the blueprint definition opens and allows setting the parameters for all assignments (static parameters) based on this blueprint instead of during assignment (dynamic parameters).
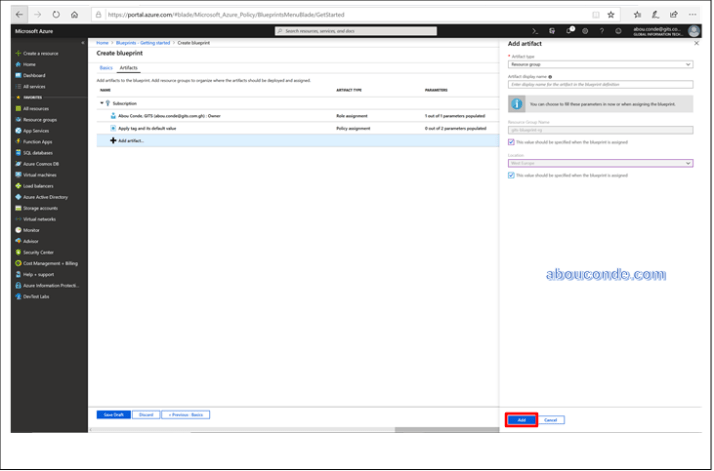
Add resource group at subscription: Click on the + Add artifact… row under Subscription. Select ‘Resource Group’ for Artifact type. Leave the Resource Group Name and Location fields blank, but make sure that the checkbox is checked on each property to make them dynamic parameters. Click Add to add this artifact to the blueprint.
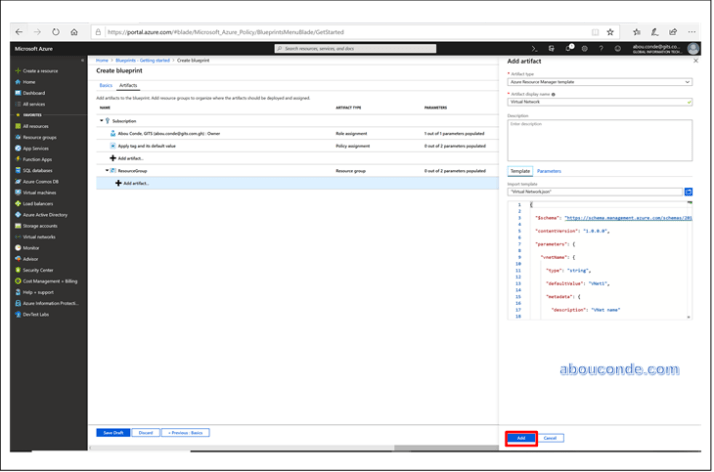
Add template under resource group: Click on the + Add artifact. row directly under the ResourceGroup entry. Select ‘Azure Resource Manager template’ for Artifact type, set Artifact display name to ‘Virtual Network’, and leave Description blank.
On the Template tab in the editor box, paste the following Resource Manager template.
After pasting the template, click on the Parameters tab and note that the template parameter Virtual Network and default value was automatically detected and populated.
{
“$schema”: “https://schema.management.azure.com/schemas/2015-01-01/deploymentTemplate.json#”,
“contentVersion”: “1.0.0.0”,
“parameters”: {
“vnetName”: {
“type”: “string”,
“defaultValue”: “VNet1”,
“metadata”: {
“description”: “VNet name”
}
},
“vnetAddressPrefix”: {
“type”: “string”,
“defaultValue”: “10.0.0.0/16”,
“metadata”: {
“description”: “Address prefix”
}
},
“subnet1Prefix”: {
“type”: “string”,
“defaultValue”: “10.0.0.0/24”,
“metadata”: {
“description”: “Subnet 1 Prefix”
}
},
“subnet1Name”: {
“type”: “string”,
“defaultValue”: “Subnet1”,
“metadata”: {
“description”: “Subnet 1 Name”
}
},
“subnet2Prefix”: {
“type”: “string”,
“defaultValue”: “10.0.1.0/24”,
“metadata”: {
“description”: “Subnet 2 Prefix”
}
},
“subnet2Name”: {
“type”: “string”,
“defaultValue”: “Subnet2”,
“metadata”: {
“description”: “Subnet 2 Name”
}
},
“location”: {
“type”: “string”,
“defaultValue”: “[resourceGroup().location]”,
“metadata”: {
“description”: “Location for all resources.”
}
}
},
“variables”: {},
“resources”: [
{
“apiVersion”: “2018-10-01”,
“type”: “Microsoft.Network/virtualNetworks”,
“name”: “[parameters(‘vnetName’)]”,
“location”: “[parameters(‘location’)]”,
“properties”: {
“addressSpace”: {
“addressPrefixes”: [
“[parameters(‘vnetAddressPrefix’)]”
]
}
},
“resources”: [
{
“apiVersion”: “2018-10-01”,
“type”: “subnets”,
“location”: “[parameters(‘location’)]”,
“name”: “[parameters(‘subnet1Name’)]”,
“dependsOn”: [
“[parameters(‘vnetName’)]”
],
“properties”: {
“addressPrefix”: “[parameters(‘subnet1Prefix’)]”
}
},
{
“apiVersion”: “2018-10-01”,
“type”: “subnets”,
“location”: “[parameters(‘location’)]”,
“name”: “[parameters(‘subnet2Name’)]”,
“dependsOn”: [
“[parameters(‘vnetName’)]”
],
“properties”: {
“addressPrefix”: “[parameters(‘subnet2Prefix’)]”
}
}
]
}
]
}
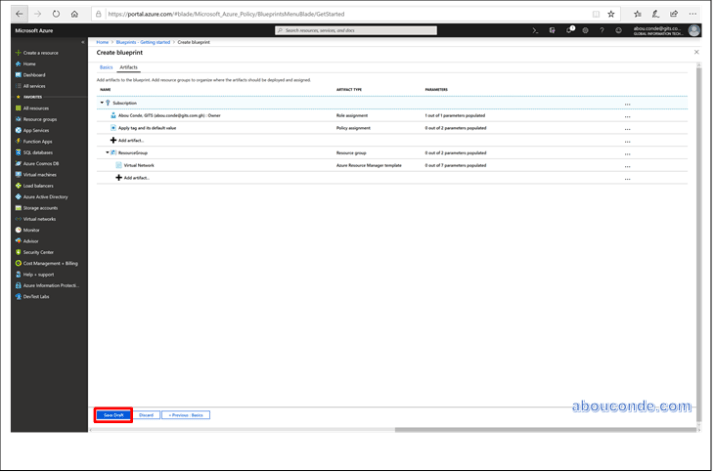
Your completed blueprint should look similar to the following. Notice that each artifact has ‘x out of y parameters populated’ under the Parameters column. The dynamic parameters are set during each assignment of the blueprint.
Now that all planned artifacts have been added, click Save Draft at the bottom of the page.
Publish a blueprint
Now that all the planned artifacts have been added to the blueprint, it’s time to publish it. Publishing makes it available to be assigned to a subscription.
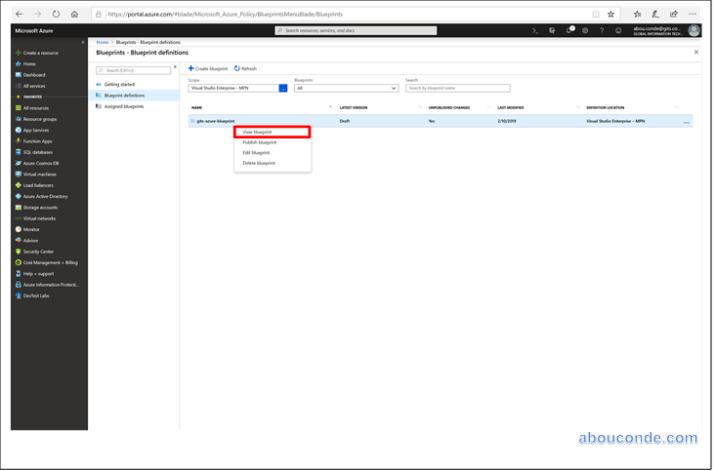
Select Blueprint Definitions from the page on the left.

In the list of blueprints, right-click on the one you previously created and select Publish Blueprint.
On the dialog that opens, provide a Version (letters, numbers, and hyphens with a max length of 20 characters) such as ‘v1’ and Change notes (optional).
Click Publish at the bottom of the page.

Assign a blueprint
Once a blueprint has been published, it can be assigned to a subscription. Assign the blueprint you created to one of the subscriptions under your management group hierarchy. If the blueprint is saved to a subscription, it can only be assigned to that subscription.
Select Blueprint Definitions from the page on the left.
In the list of blueprints, click on the ellipsis on the one you previously created and select Assign Blueprint.

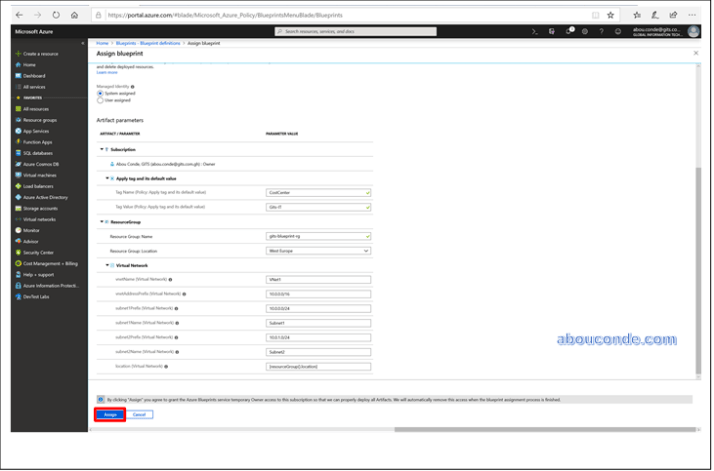
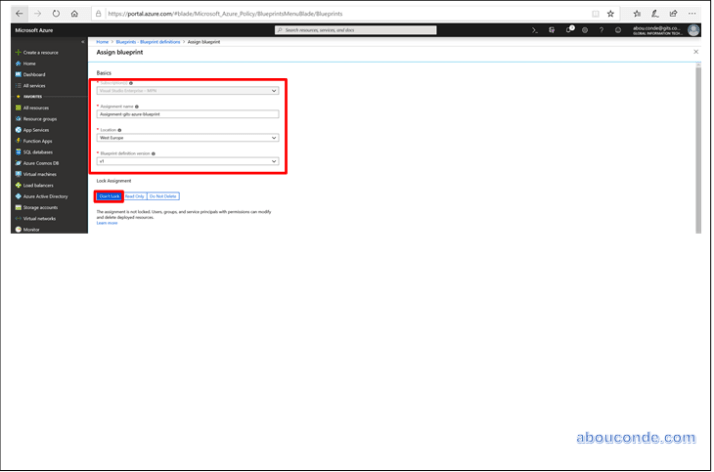
On the Assign Blueprint page, select the subscription(s) you want to deploy this blueprint to from the Subscription drop-down.
For Assigned Name, provide a unique name for this assignment.
In Location, select a region for the managed identity to be created in. Azure Blueprint uses this managed identity to deploy all artifacts in the assigned blueprint.
Leave the Blueprint definition version drop-down of Published versions on the ‘v1’ entry (default as the most recently Published version).
For Lock Assignment, leave the default of Don’t Lock.
For the subscription level policy assignment, set the Tag Name to ‘CostCenter’ and the Tag Value to ‘Gits-IT’.
For the ‘Resource Group’, provide a Name of ‘gits-blueprint-rg’ and a Location of ‘West Europe’ from the drop-down.
Read the information box at the bottom of the page and then click Assign.