
By integrating Windows Store for Business to SCCM, organizations can synchronize the list of apps with SCCM, view these in the SCCM administration console, and deploy them like any other app. To get started with Windows Store for Business, you will need to be a Global Administrator in Azure Active Directory.
Login or sign up for access to the Windows Store for Business here https://www.microsoft.com/en-us/business-store.
The Microsoft Store for Business supports two types of app:
- Online: This license type requires users and devices to connect to the store to get an app and its license. Windows 10 devices must be Azure Active Directory (Azure AD) domain-joined.
-
ffline: This type lets you cache apps and licenses to deploy directly within your on-premises network. Devices don’t need to connect to the store or have a connection to the internet.
Register SCCM as web application in Azure AD
In the left-hand navigation pane, select the Azure Active Directory service.
Select App registrations and then select New application registration.
Name: MSFB-SCCM
Application type:
Select Native for client applications that are installed locally on a device.
This setting is used for OAuth public native clients.
Select Web app/API for client applications and resource/API applications that are installed on a secure server.
When finished, select Create.

You are taken to the application’s main registration page, which contains the Settings page for the application.

To add a credential for your web application:
Select the Keys section on the Settings page.

To add a password:
Add a description for your key.
Select a duration.
Select Save. The right-most column will contain the key value, after you save the configuration changes.
Be sure to copy the key for use in your client application code, as it is not accessible once you leave this page.

In the Microsoft Store for Business portal, select Settings > Management tools;
On the Management tools page, click Add a management tool to open the Add a management tool dialog box;

On the Add a management tool dialog box, search for the just created and configured app and click Add to return to the Management tools page;

Back on the Management tools page, click Activate next to the just added management tool

In the Configuration Manager console, go to the Administration workspace, expand Cloud Services, and select the Azure Services node.
in the Azure Services group, select Configure Azure Services.
On the Azure Services page of the Azure Services Wizard:
- Specify a Name for the object in Configuration Manager.
- Select Microsoft Store for Business to connect with Configuration Manager.
Select Next to continue to the Azure app properties page of the Azure Services Wizard.
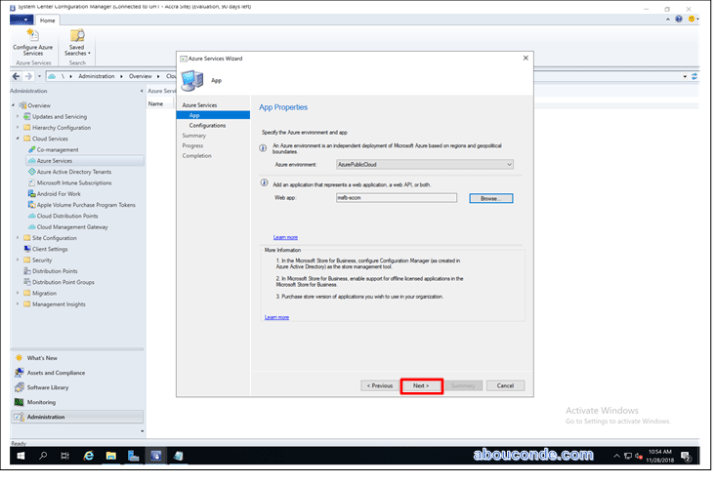
 On the App page of the Azure Services Wizard, first select the Azure environment from the list
 When you select Import from the Server app dialog or the App page of the Azure Services Wizard, it opens the Import apps dialog.
This page lets you enter information about an Azure AD web app that is already created in the Azure portal.
It imports metadata about that web app into Configuration Manager.
Specify the following information:
- Azure AD Tenant Name
- Azure AD Tenant ID
- Application Name: A friendly name for the app.
- Client ID
- Secret Key
- Secret Key Expiry: Select a future date from the calendar.
-
App ID URI: This value needs to be unique in your Azure AD tenant.
It is in the access token used by the Configuration Manager client to request access to the service.
After entering the information, select Verify. Then select OK to close the Import apps dialog.

Configuration has almost come to an end,

After the configuration is completed the administrator can view the sync status and the configuration details in the administration console via Administration > Overview > Cloud Services.


It’s actually a cool and useful piece of info. I’m glad that you shared this helpful info with us. Please keep us up to date like this. Thanks for sharing.
LikeLike
It’s my pleasure 😎
LikeLike